
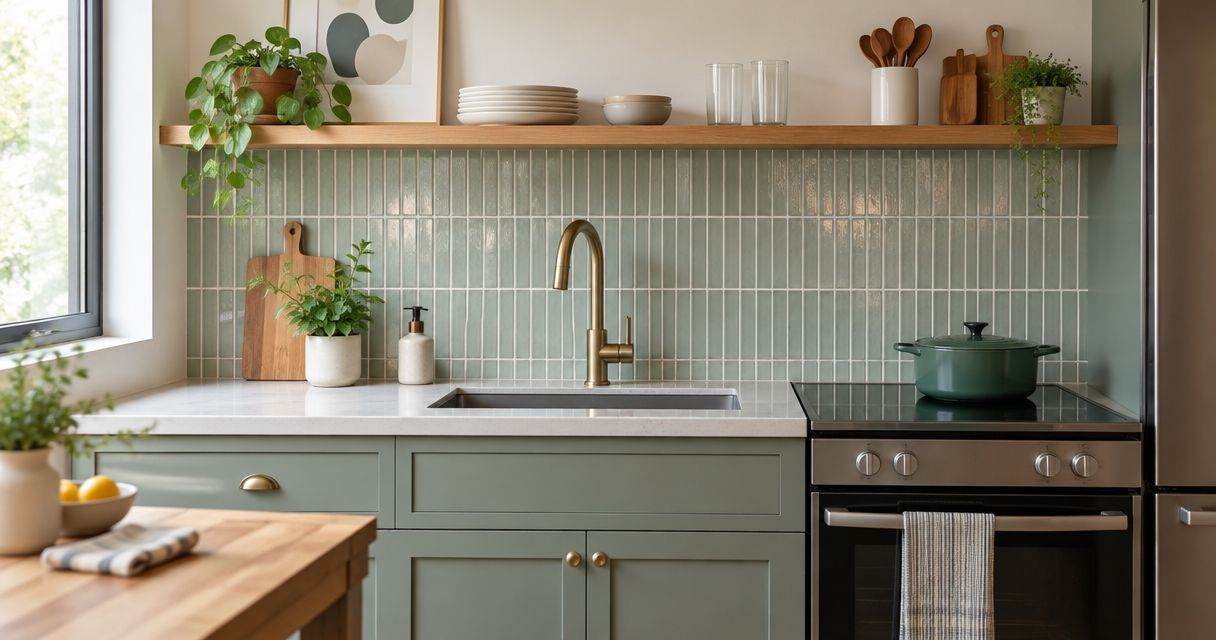
Best overall: horizontal straight stack. Best for a low splashback: vertical stack. Best for a feature behind the cooktop: herringbone. These are the best tile patterns for small splashbacks in 2026 when you match the layout to the wall’s proportions, cabinet lines and exposed edges—not just the tile display.
- Horizontal straight stack leads the best tile patterns for small splashbacks: orderly joints suit compact kitchen walls.
- Vertical stack suits low splashbacks; running bond suits a traditional kitchen without a complex feature pattern.
- Herringbone suits an uninterrupted feature area, but its diagonal edge cuts need careful planning.
- Melbourne Tiling Group provides kitchen tiling services for Melbourne homeowners planning a splashback installation.
Why this matters
A small kitchen splashback has several competing boundaries: the benchtop, overhead cupboards, power points and the end of the cabinet run. A pattern that looks balanced on a sample board can leave awkward slivers against those boundaries. Choose the layout on your actual wall before you commit to the tiles.
Melbourne Tiling Group provides residential wall and floor tiling, including kitchen tiling. For a compact Melbourne kitchen, the useful starting point is a measured layout showing where full tiles, cuts and finished edges will sit.
If you are planning a 2026 renovation in Melbourne’s south-east, take tile samples into the kitchen rather than judging them under showroom lighting. Check them beside the benchtop, cabinet doors and tapware. The pattern should work with those fixed elements, not compete with every one of them.
What makes the best small splashback pattern?
Use these criteria to choose your layout:
- Wall proportions: A long strip and a tall cooktop recess need different set-outs. Judge the whole tiled shape.
- Edge cuts: Look for balanced cuts at visible ends. Avoid choosing a pattern that depends on tiny pieces beside a trim.
- Grout contrast: Similar tile and grout colours soften the grid. Strong contrast makes every joint part of the design.
- Cabinet alignment: Check how joints meet cupboard edges, shelves and the rangehood. Accidental near-alignments look unresolved.
- Cleaning: Pattern does not determine stain resistance. Tile texture, grout selection and the number of joints also matter.
- Installation scope: Ask for preparation, set-out, cutting, edge finishing and sealing requirements to be listed separately.
For your 2026 selection, settle the material before finalising the pattern. The kitchen splashback materials guide covers that separate decision; this guide ranks the layouts.
Small splashback patterns at a glance
| Rank and pattern | Best for | Standout feature | Key limitation |
|---|---|---|---|
| 1. Horizontal straight stack | An orderly everyday kitchen | Continuous horizontal and vertical joints | Uneven alignment is easy to notice |
| 2. Vertical stack | A low splashback beneath cupboards | Upright rectangular tiles | Thin cuts can appear along the top |
| 3. Running bond | A traditional kitchen | Staggered rectangular rows | Offset joints need planning around fittings |
| 4. Herringbone | An uninterrupted cooktop feature | Rectangles form a repeating zigzag | Diagonal perimeter cuts complicate finishing |
| 5. Large-format grid | A restrained wall with fewer joints | Larger tile faces interrupt the surface less | Cut-outs and handling need careful assessment |
| 6. Square grid | A period-style or geometric kitchen | Equal-sided tiles form a regular grid | Contrasting grout makes the wall visually busier |
1. Horizontal straight stack: best for an orderly kitchen
Horizontal straight stack places rectangular tiles in aligned rows, with their long edges running across the wall. Horizontal and vertical joints meet at 90 degrees. The resulting grid gives you clear lines to check against the benchtop and cupboards.
Best for: a compact kitchen where the splashback should support the cabinetry rather than become the main feature. Choose a grout colour close to the tile if you want the joints to recede. A contrasting grout turns the same layout into a stronger geometric statement.
Horizontal straight stack pros:
- Straight joints make the layout easy to understand before installation.
- Rectangular tiles suit a long splashback strip.
- A simple grid lets tile colour or surface texture carry the interest.
Horizontal straight stack cons:
- Misaligned joints are conspicuous.
- A poor starting point can still leave narrow cuts at both ends.
Check the proposed grid at the most visible end, not just at the centre. Verdict: Buy—horizontal straight stack is the default choice for an undecided homeowner.
2. Vertical stack: best for a low splashback
Vertical stack uses rectangular tiles upright, with joints aligned rather than staggered. It changes the direction of the pattern without adding diagonal cuts. That makes it a useful alternative when a horizontal layout repeats too many lines already present in the cabinetry.
Best for: a shallow splashback beneath overhead cupboards. Upright tiles emphasise the vertical direction, but they do not change the wall’s dimensions. Test the layout against the actual gap between benchtop and cupboard before choosing the tile length.
Vertical stack pros:
- Upright rectangles give the splashback a distinct direction.
- Aligned joints keep the layout orderly.
- The pattern provides interest without a zigzag feature.
Vertical stack cons:
- Tile length can leave a thin cut beneath the cupboards.
- Strong grout contrast emphasises closely spaced vertical joints.
Check the top and bottom cuts together. Moving the starting line can produce a more balanced result than insisting on a full tile at the benchtop. Verdict: Buy for a low wall after approving the cut layout.
3. Running bond: best for a traditional kitchen
Running bond lays rectangular tiles horizontally with neighbouring rows offset. The staggered joints give it the familiar brickwork appearance often associated with subway tiles. It suits a kitchen where a perfectly aligned grid feels too rigid.
Best for: traditional cabinetry and a straightforward rectangular splashback. The offset should suit the selected tile and its installation guidance. Do not assume every long tile should use the same stagger.
Running bond pros:
- Staggered joints provide movement without diagonal rows.
- The brickwork layout pairs naturally with traditional kitchen details.
- Simple tile colours keep the pattern readable.
Running bond cons:
- Alternating rows create different cuts at the wall ends.
- Power points can interrupt the stagger in conspicuous places.
Ask to see the layout around sockets and external corners before installation starts. A tidy row in the centre is not enough if the visible ends look unfinished. Verdict: Buy for a traditional kitchen; hold until the offset and perimeter cuts are agreed.
4. Herringbone: best for a cooktop feature
Herringbone places rectangular tiles at right angles to each other, forming a repeating zigzag. In a diagonal set-out, tile edges commonly run at 45 degrees to the wall boundaries. That direction creates triangular and angled cuts around the perimeter.
Best for: an uninterrupted splashback area behind the cooktop. Herringbone has enough visual movement on its own. Keep the surrounding cabinet and benchtop choices restrained if you want the pattern to remain the focus.
Herringbone pros:
- The zigzag gives a plain rectangular tile a distinct layout.
- A central feature area provides room to read the pattern.
- Similar-colour grout softens the individual tile outlines.
Herringbone cons:
- Diagonal perimeter cuts need careful finishing.
- Sockets, shelves and short returns can break up the pattern.
- Strong grout contrast adds visual detail to an already active layout.
For a 2026 kitchen update, approve the centreline and edge treatment together. Verdict: Buy for a clear feature wall; skip for a heavily interrupted strip.
5. Large-format grid: best for fewer grout joints
A large-format grid uses larger tiles in a straightforward aligned layout. Compared with smaller tiles across the same area, larger tiles generally create fewer joints. That gives the tile surface more visual space and reduces the amount of grout to clean.
Best for: a restrained splashback where tile faces matter more than the pattern. Large-format does not mean grout-free, and fewer joints do not remove the need for correctly prepared surfaces or suitable materials.
Large-format grid pros:
- Fewer joints keep the surface less interrupted.
- Larger faces let a tile’s colour or veining remain visible.
- An aligned layout avoids the zigzag of a feature pattern.
Large-format grid cons:
- Socket cut-outs can become a significant part of the installation.
- A narrow wall can leave only fragments of the selected tile.
- Larger tiles need suitable handling and substrate preparation.
Inspect how much of each tile remains after cutting. Verdict: Buy when the wall accommodates the tile size; hold if fittings dominate the layout.
6. Square grid: best for a period-style kitchen
Square grid uses equal-sided tiles in aligned rows. Like straight stack, its joints meet at 90 degrees, but the tile proportions give the wall a different rhythm. It is a useful alternative when rectangular subway tiles do not suit the room.
Best for: a period-style kitchen or a deliberately geometric finish. Keep tile colour, grout colour and neighbouring surfaces in the same conversation. A square grid with dark joints is a much stronger feature than the same tile with closely matched grout.
Square grid pros:
- Equal-sided tiles create a clear, regular pattern.
- The layout suits both plain and varied tile colours.
- Straight boundaries make the proposed set-out easy to review.
Square grid cons:
- Small squares create more joints than larger tiles over the same area.
- Strong contrast can compete with patterned benchtops.
Check a sample containing several tiles and joints, not a single loose tile. Verdict: Buy for a deliberate geometric look; skip high-contrast grout if the kitchen already has several patterns.
How the patterns are ranked
Horizontal straight stack takes first place because its aligned joints provide a clear starting point for a compact wall. The remaining patterns each answer a different brief: upright direction, traditional stagger, a zigzag feature, fewer joints or a square grid.
This is a layout ranking, not a claim that one pattern produces a more durable installation. Durability depends on preparation, suitable installation materials and workmanship. Your wall dimensions and fittings decide whether the preferred pattern earns its place.
Plan the splashback before installation
A good-looking sample is only the starting point. Melbourne Tiling Group provides kitchen tiling services; use the planning discussion to settle these details before the wall is tiled.
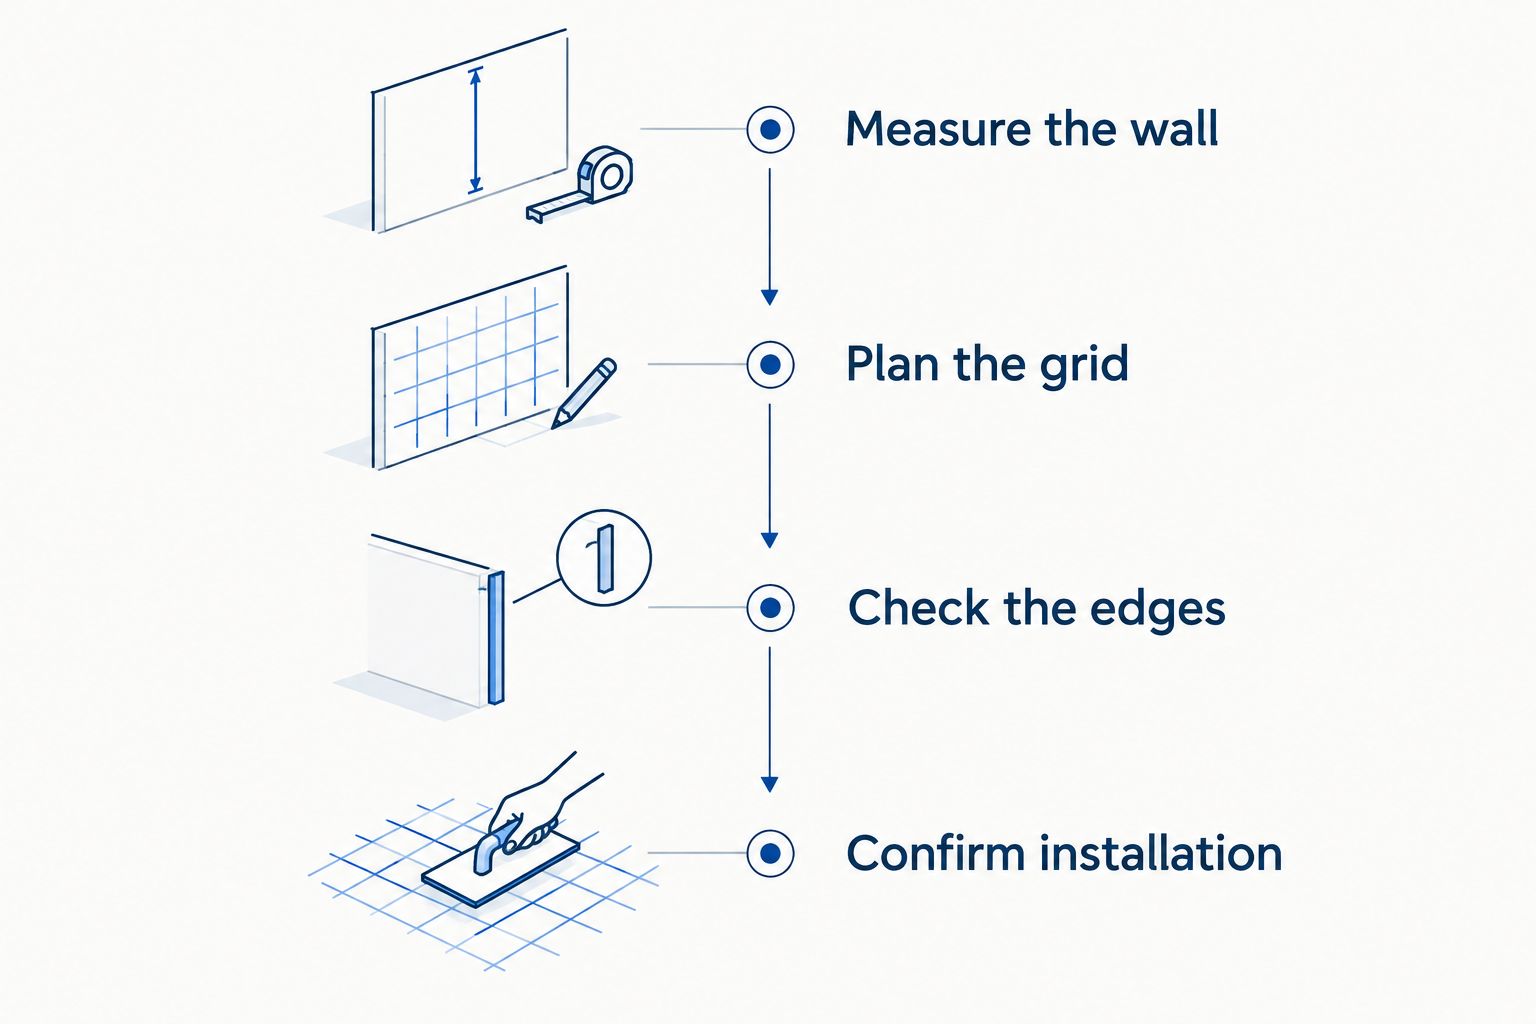
Measure the wall
Record the tiled height, each wall run and the position of sockets, cupboards and the rangehood. Include returns and exposed ends. Do not assume the benchtop or existing wall is perfectly level.
Plan the grid
Review a set-out showing full tiles and cuts. Check the centreline, visible corners and the space beneath cupboards. Approve the pattern on the measured wall, not on a catalogue photograph.
Check the edges
Decide how exposed tile ends will finish and how the splashback meets neighbouring surfaces. Agree on grout colour using a physical sample where possible. Check whether the chosen tile needs sealing and follow its supplier’s instructions.
Confirm installation
Confirm wall preparation, adhesive suitability, movement joints and the treatment of water-exposed junctions. Tiles and grout alone are not a substitute for a required waterproofing system. Discuss the applicable requirements for the actual kitchen rather than copying a shower specification.
For an affordable 2026 project, compare quotes against the same scope. Ask whether preparation, cuts, edge finishing and cleanup are included. A simpler pattern does not justify skipping preparation, and a detailed pattern needs its cutting requirements clearly identified.
Which splashback pattern should you choose?
Choose horizontal straight stack if you want an orderly small splashback without a strong feature pattern. Choose vertical stack when the upright direction better suits a low wall. Choose running bond for a traditional look, or herringbone when an uninterrupted area gives the zigzag room to read.
Large-format grid is the choice for fewer joints. Square grid is the choice for a deliberate geometric finish. Neither should be selected without checking the cuts around fittings.
Melbourne Tiling Group provides kitchen tiling for Melbourne homeowners planning a splashback installation. For your 2026 project, take a preferred pattern and a fallback layout into the installation discussion, then choose from the measured set-outs.
FAQ
What's the best tile pattern for a small kitchen splashback?
Horizontal straight stack is the best default for an orderly small kitchen splashback. Its aligned joints give you a clear layout to check against cupboards, benchtops and exposed ends.
Should splashback tiles run horizontally or vertically?
Choose horizontal tiles for a lengthwise pattern and vertical tiles for an upright pattern. Compare both set-outs on the actual wall, because tile length and cupboard height determine the cuts.
Is herringbone too busy for a small splashback?
Herringbone suits a small splashback with an uninterrupted feature area. A wall crowded with sockets, shelves and returns breaks up the zigzag, while contrasting grout makes it more prominent.
Do large tiles work on a small kitchen splashback?
Large tiles work when the wall dimensions and fittings leave useful sections of tile after cutting. They create fewer joints than smaller tiles over the same area, but socket cut-outs and handling need assessment.
Should I match the grout colour to the splashback tiles?
Match the grout closely to the tile when you want the grid to recede. Choose contrast when you deliberately want to emphasise the pattern, then check a physical sample beside the cabinetry.
Does a kitchen splashback need waterproofing?
Waterproofing requirements depend on the kitchen construction, exposure and applicable building requirements. Confirm the required treatment before tiling; tiles and grout alone do not replace a required waterproofing system.
How do I compare quotes for a patterned splashback?
Compare quotes using the same tile, pattern and installation scope. Ask each installer to identify preparation, cutting, exposed-edge finishing and sealing requirements so the comparison covers the same work.
One last thing
The most useful detail to inspect is often the smallest cut at the most visible edge. A splashback can look balanced through the middle and still end with an awkward sliver beside a doorway or cabinet.
Before approving your 2026 layout, ask to see that edge on the set-out. Shifting the grid can change the result without changing the tile. Fix the starting position before installation; grout cannot disguise a poorly planned cut.


