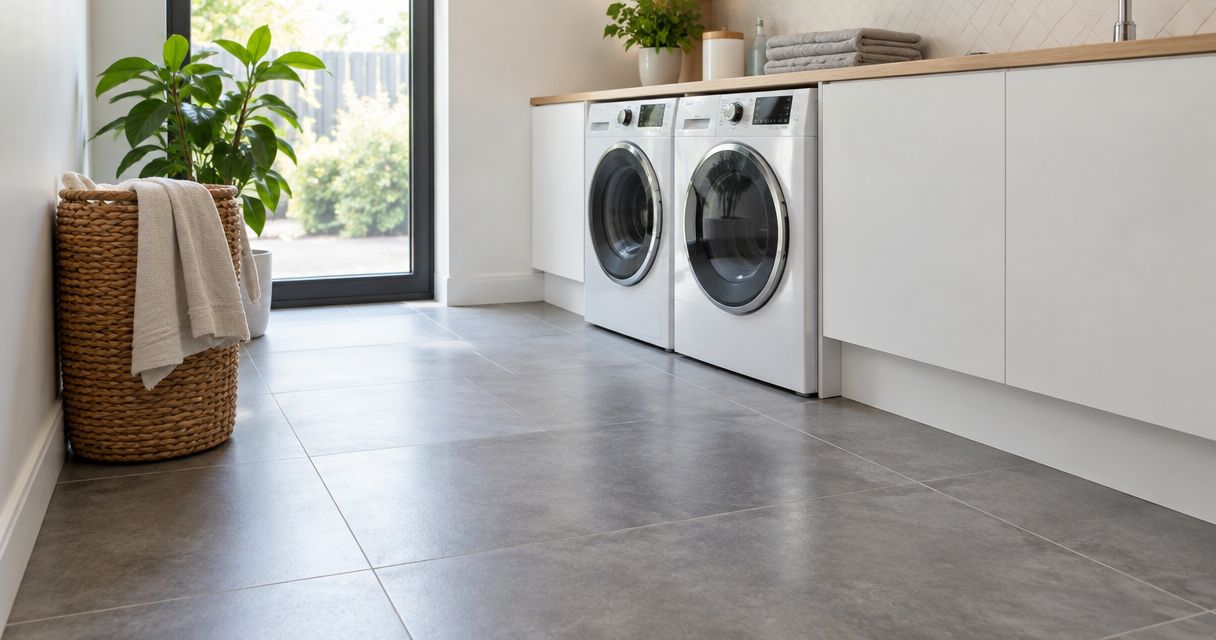
Best overall starting point: 300 × 600 mm floor tiles. Best for open-plan continuity: 600 × 600 mm tiles. Best for a narrow splashback: 75 × 300 mm tiles. This 2026 guide compares the best tile sizes for small kitchens in Melbourne, with practical advice on cuts, grout lines and installation.
- For small Melbourne kitchens, start with 300 × 600 mm floor tiles and check the layout before ordering.
- Choose 600 × 600 mm tiles when the kitchen floor continues into an open-plan living area.
- Use 75 × 300 mm splashback tiles when you want rectangular detail beneath overhead cupboards.
- Melbourne Tiling Group suits homeowners seeking kitchen wall and floor tiling installation.
Why this matters
A small kitchen does not automatically need small tiles. The better choice depends on the exposed floor, cabinet positions and where cut tiles finish.
For your 2026 renovation, choose floor and splashback sizes separately. A floor tile must suit foot traffic and the supporting surface; a splashback tile must work around benchtops, power points and cupboards.
Melbourne Tiling Group provides kitchen wall and floor tiling for Melbourne homeowners. Choose the layout before committing to the tile size. That keeps an attractive showroom sample from becoming an awkward installation.
What makes the best tile size for a small kitchen?
Use these checks before comparing formats:
- Visible floor: Measure the floor you actually see between cabinets, not just the room's outside dimensions.
- Edge cuts: Check doorway cuts, cabinet edges and exposed ends. Avoid choosing a size that leaves conspicuous narrow strips.
- Surface condition: Larger tiles need careful checks for flatness. A bigger tile does not correct an uneven floor.
- Grout pattern: Smaller tiles create more joints across the same area. Contrasting grout makes those joints more noticeable.
- Installation detail: Include power points, trims, corners and transitions. These details affect both the finished appearance and the work involved.
Small-kitchen tile sizes at a glance
These are layout recommendations for 2026, not product rankings. Confirm that the particular tile is suitable for its intended wall or floor use.
| Tile size | Best for | Standout feature | Key limitation |
|---|---|---|---|
| 300 × 600 mm | Separate kitchen floors | Rectangular layout without an oversized format | Direction and edge cuts need planning |
| 600 × 600 mm | Open-plan kitchen floors | Continuity into adjoining living areas | Large cuts can dominate a tight footprint |
| 300 × 300 mm | Tight or interrupted floors | Smaller modules around changes in shape | More grout joints than larger formats |
| 75 × 300 mm | Narrow splashbacks | Directional pattern beneath cupboards | Extra joints and cuts around fittings |
| 100 × 100 mm | Period-style splashbacks | A clear square grid | Strong grout contrast can look busy |
| 50 × 50 mm mosaics | Small feature sections | Fine detail in a contained area | Numerous joints need cleaning |
1. 300 × 600 mm tiles: best for separate kitchen floors
Best for: a small kitchen with a clearly defined floor area. Start here if you want a rectangular format without jumping straight to a large square tile. Check both orientations against the doorway and cabinet runs.
A rectangle introduces direction, but it does not physically widen the room. Let the exposed floor and cut positions decide which way it runs.
300 × 600 mm tile pros:
- Offers a rectangular alternative to a square grid.
- Creates fewer joints than smaller tiles covering the same area.
- Gives you different layout directions to compare.
300 × 600 mm tile cons:
- An unplanned starting point can leave narrow edge cuts.
- Offset layouts need to follow the tile manufacturer's guidance.
Ask your tiler to mark the main sightline from the kitchen entrance. A balanced layout there matters more than centring tiles beneath cabinets where nobody sees them.
Verdict: Buy if the dry layout gives you balanced cuts along the visible edges.
2. 600 × 600 mm tiles: best for open-plan continuity
Best for: a kitchen that shares its floor with dining or living space. A continuous tile size avoids adding a separate grid at the kitchen boundary. Make the decision across the whole connected area, not just between the cupboards.
This is a useful 2026 shortlist option when you are replacing the adjoining floor too. It is less convincing when the kitchen is isolated and nearly every tile needs cutting.
600 × 600 mm tile pros:
- Supports a consistent layout across connected rooms.
- Reduces joint frequency compared with smaller square formats.
- Gives a broad, uninterrupted surface within each tile.
600 × 600 mm tile cons:
- A tight floor can contain mostly cut pieces.
- Surface preparation and handling need careful attention.
Check thresholds and adjoining floor heights before ordering. A continuous appearance still needs proper movement joints and a suitable installation system.
Verdict: Buy for a connected floor; skip if the kitchen layout turns most tiles into awkward offcuts.
3. 300 × 300 mm tiles: best for tight, interrupted floors
Best for: kitchens with returns, short passages or several changes in shape. A smaller square gives you a different set-out option where larger formats produce poor edge cuts. It still needs a measured layout.
Do not assume smaller tiles hide an uneven base. Preparation remains essential, and loose or moving substrates need assessment before tiling starts.
300 × 300 mm tile pros:
- Offers a smaller module around cabinet returns.
- Makes a straightforward square-grid layout possible.
- Provides an alternative when larger sizes leave sliver cuts.
300 × 300 mm tile cons:
- Creates more grout joints than larger formats.
- High-contrast grout can make the floor look busier.
Compare a close grout colour with a contrasting sample. For a quieter floor, start with a colour near the tile, then judge it beside the cabinetry rather than in isolation.
Verdict: Buy when the smaller module improves the set-out; hold if you only chose it because the kitchen is small.
4. 75 × 300 mm tiles: best for narrow splashbacks
Best for: a splashback between the benchtop and overhead cupboards. This rectangular format gives you a clear horizontal or vertical pattern. Test both against the actual splashback height.
Horizontal laying follows the benchtop line. Vertical laying changes the emphasis, but neither removes the need to plan cuts around sockets and cupboard ends.
75 × 300 mm tile pros:
- Offers distinct horizontal and vertical layouts.
- Adds pattern without requiring a decorative tile face.
- Works as a separate design choice from the floor.
75 × 300 mm tile cons:
- Produces more joints than a large splashback tile.
- Socket positions can interrupt the pattern.
For a 2026 kitchen update, finalise cabinetry and benchtop positions before setting out the splashback. The guide to cabinetry installation and splashback tiling explains how these stages fit together.
Verdict: Buy when the row heights and electrical fittings suit the layout.
5. 100 × 100 mm tiles: best for period-style splashbacks
Best for: a kitchen where a visible square grid is part of the design. Small square tiles suit a deliberate tiled look rather than an almost joint-free surface. Compare them with your cabinet profiles and benchtop pattern.
In a period-style renovation, let the tile size support the room rather than compete with every other detail. A simple layout can be enough.
100 × 100 mm tile pros:
- Creates a clear, regular square pattern.
- Gives a distinct alternative to rectangular splashbacks.
- Allows colour and grout to shape the overall appearance.
100 × 100 mm tile cons:
- Numerous joints add visual detail.
- Busy benchtops and contrasting grout can compete.
Check the top row beneath cupboards before deciding. A familiar tile size is not automatically a good fit for the available height, particularly when the benchtop or cupboard line varies.
Verdict: Buy for an intentional square-grid finish; skip if your priority is minimal visible grout.
6. 50 × 50 mm mosaics: best for a contained feature
Best for: a small splashback feature rather than an entire visually busy kitchen. Mosaics make the joints part of the design. Use them deliberately, especially beside patterned benchtops or detailed cabinetry.
Sheet-mounted mosaics still require careful alignment. The joins between sheets should not stand out from the joints within each sheet.
50 × 50 mm mosaic pros:
- Adds fine detail to a limited section.
- Creates a distinct contrast with larger floor tiles.
- Gives a small feature area its own texture and rhythm.
50 × 50 mm mosaic cons:
- Numerous grout joints require cleaning.
- Uneven sheet spacing can remain visible after grouting.
Check the actual mosaic material and its cleaning instructions. Natural stone, glass and ceramic mosaics do not all need the same installation or care.
Verdict: Buy for a planned feature; skip as the default if easy cleaning and fewer joints lead your brief.
How to check the layout before installation
A tile sample tells you about colour and texture. A set-out tells you whether that tile belongs in your kitchen.
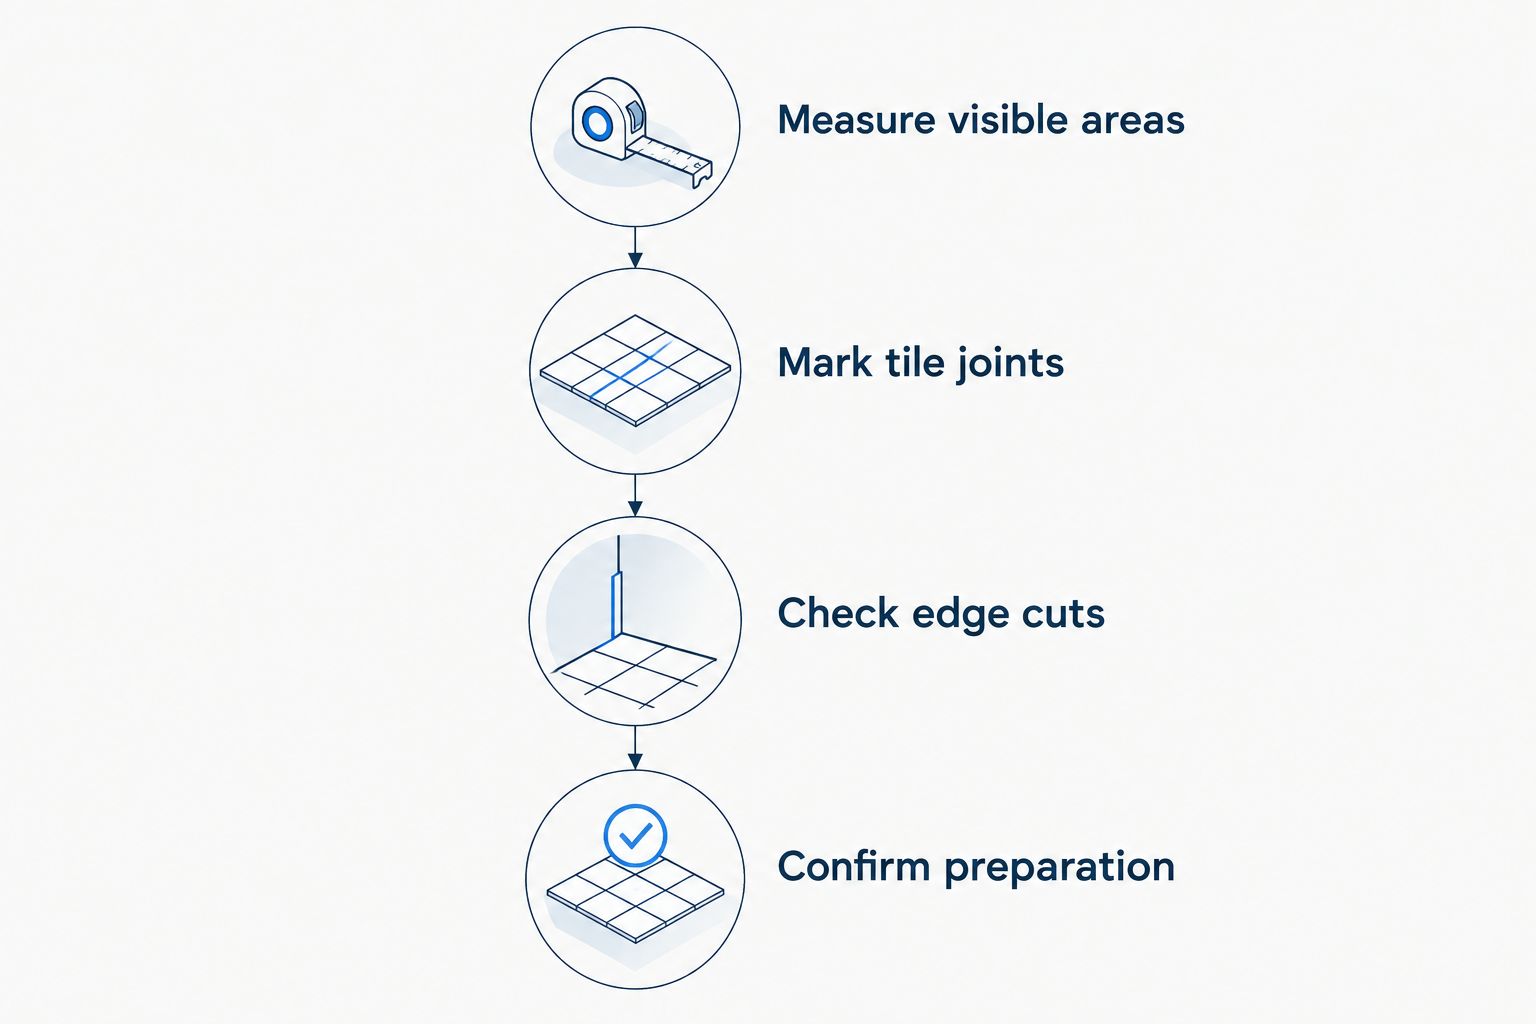
Follow this sequence before placing the order:
- Measure visible areas. Record cabinet runs, doorways, splashback height and exposed ends. Include appliance spaces where the floor remains visible.
- Mark tile joints. Use the actual tile dimensions and proposed grout spacing. Nominal tile sizes alone do not give the finished layout.
- Check edge cuts. Compare starting positions and both rectangular orientations. Pay attention to the doorway view and splashback corners.
- Confirm preparation. Have the floor or wall assessed for flatness, soundness and suitability. Resolve preparation before agreeing on installation scope.
For a south-east Melbourne renovation, use the same checks whether you are refreshing a splashback or replacing the kitchen floor. The address does not decide the tile size; the measured space does.
Keep the installation practical and affordable
Compare the complete scope, not the tile size alone. Removal, preparation, cuts, edging and access all form part of the job. A straightforward layout is easier to compare across quotes than an undefined request to tile the kitchen.
Ask for the following to be clear:
- Which existing finishes need removal.
- What surface preparation is included.
- Where the tile layout starts and finishes.
- How corners, exposed edges and movement joints are treated.
- What protection and cleaning form part of the installation.
Tiles and grout are not a substitute for required waterproofing. Ask what moisture protection the kitchen surfaces need, and check appliance and cooking-area requirements before choosing a splashback system.
Melbourne Tiling Group provides kitchen tiling installation. Bring measurements, photos and your shortlisted sizes so the discussion covers the actual work rather than appearance alone.
Discuss your kitchen tiling layout
Bring your measurements and shortlisted sizes to discuss wall and floor tiling installation.
How the tile sizes were ranked
The order prioritises separate kitchen floors, connected floors, awkward footprints and then splashback uses. Each recommendation balances layout flexibility, visible joints, edge cuts and installation detail.
These are starting points for a 2026 renovation, not a claim that one size wins in every kitchen. The measured set-out decides the final choice.
Which tile size should you choose?
Start with 300 × 600 mm for a separate kitchen floor and 75 × 300 mm for a tiled splashback. Compare 600 × 600 mm when the floor continues into an adjoining living area.
Choose smaller squares when they solve a layout problem or deliver a deliberate period-style finish. Keep mosaics for a feature you genuinely want to maintain. Melbourne Tiling Group's kitchen tiling services cover wall and floor installation, so discuss both surfaces together while keeping their material requirements separate.
FAQ
What's the best tile size for a small Melbourne kitchen in 2026?
Start by comparing 300 × 600 mm floor tiles against your measured layout. They offer a rectangular option without moving straight to a large square format, but visible edge cuts should decide the final choice.
Are 600 × 600 mm tiles too big for a small kitchen?
No, 600 × 600 mm tiles are not automatically too big for a small kitchen. They deserve consideration when the kitchen shares a floor with adjoining rooms, provided the set-out avoids awkward cuts.
Should a small kitchen have small tiles?
No, room size alone does not determine tile size. Check the exposed floor, cabinet positions and grout pattern before choosing a smaller format.
What's a good tile size for a narrow kitchen splashback?
75 × 300 mm tiles are a useful starting point for a narrow kitchen splashback. Check the available height, cupboard ends and power point positions before deciding on horizontal or vertical laying.
Do larger tiles make a kitchen look bigger?
Larger tiles reduce joint frequency compared with smaller tiles, but they do not guarantee a bigger-looking kitchen. Colour, grout contrast, lighting and the finished cuts also affect the appearance.
Can I use the same tile on the kitchen floor and splashback?
Use the same tile only when the specific product is suitable for both applications. Check its floor suitability, wall installation requirements and care instructions rather than assuming matching appearance means matching performance.
Is a smaller tile always cheaper to install?
No, tile size alone does not determine installation cost. Surface preparation, layout complexity, cuts, access and edge details all need to be included in the scope.
One last thing
Check the sample from the kitchen doorway, not only while standing over it. That is where you will notice an off-centre layout or an awkward strip beside the cabinets. A well-planned cut is more useful than a fashionable tile size.