
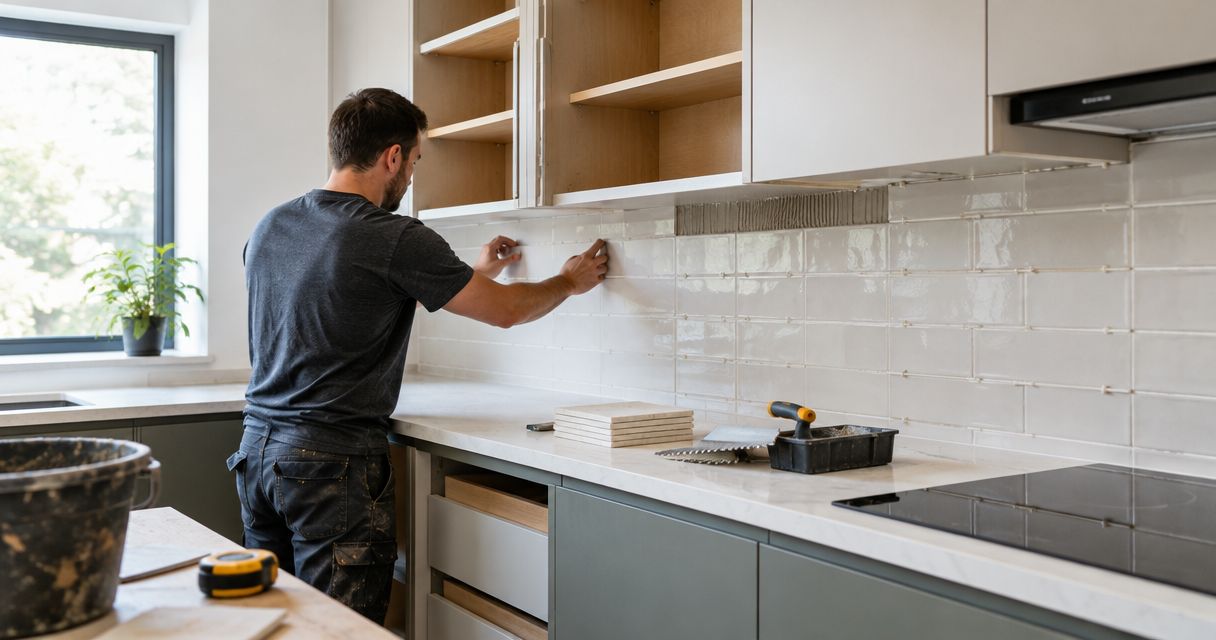
Instead of organising cabinet fitting and splashback tiling separately, install and secure the cabinets, fit the benchtop, then tile against the finished surfaces. If you’re asking whether to install cabinets before or after splashback tiling, cabinets and benchtops come first in a standard kitchen renovation; this 2026 workflow sets out the handovers that keep the job in order.
- Cabinets before or after splashback tiling? Fit cabinets and benchtops first in a standard kitchen renovation.
- Melbourne Tiling Group suits Melbourne homeowners seeking kitchen splashback tiling as part of a wall and floor tiling project.
- Confirm appliance clearances, wall preparation and tile layout before fixing splashback tiles.
- Replacing only the splashback works when retained cabinets, benchtops and wall surfaces are suitable.
Why this matters
A splashback finishes against other parts of the kitchen. Cabinet position, benchtop height, power points and the rangehood determine where tiles start, stop and need cutting. Tiling before those positions are settled creates avoidable rework.
Melbourne Tiling Group is best for Melbourne homeowners seeking kitchen splashback tiling within a wall and floor tiling project. Discuss the tiling scope with Melbourne Tiling Group before locking in the cabinet and benchtop handovers. The wider building and appliance work still needs its own agreed responsibilities.
For a 2026 kitchen renovation in Melbourne’s south-east, build the schedule around completed work rather than separate trade arrival dates. A booked tiling day is not useful if the benchtop is still waiting for installation.
Before you start
- Have the final kitchen plan and appliance instructions. Include cabinet positions, benchtop details, splashback boundaries, power points and rangehood requirements. Confirm who will handle electrical, plumbing and gas work.
- Have the actual finish selections ready. Supply the tile sample, grout selection and edge detail. Confirm that adhesive, grout and sealant suit the tile, substrate and intended exposure.
- Check the hidden dependency: final benchtop position. The cabinet installation alone does not establish the splashback’s lower edge. Wait until the benchtop is fitted and accepted before taking final tile measurements.
Do not copy bathroom waterproofing details into a kitchen without checking the application. Tiles and grout do not replace a specified waterproofing system. Have the relevant trade confirm what protection the wall requires before tiling conceals it.
Cabinet and appliance handover
The first configuration unit is the kitchen itself. Establish the fixed surfaces and service positions before the tiler sets out the splashback.
- Confirm the cabinet layout. Check base cabinets, wall cabinets, end panels and exposed edges against the agreed plan. Resolve changes before they affect the tile boundaries.
- Secure and check the cabinets. Have the cabinet installer confirm that the units are fixed, aligned and ready for the benchtop. Do not use tile cuts to disguise an unresolved cabinet installation problem.
- Confirm appliance positions. Check the cooktop and rangehood instructions together. Required clearances depend on the appliance and installation; a decorative tile line must not determine them.
- Settle service locations. Ask the electrician and plumber to confirm power points, outlets and other penetrations. Electrical disconnection and reconnection belong with a licensed electrician, not the tiler or homeowner.
- Record the boundaries. Identify the underside of wall cabinets, the rangehood zone and every exposed splashback edge on the plan.
Expected result: the cabinet run is secure, service positions are agreed and the splashback boundaries are clear. A cabinet door or end panel should not need moving after the tile layout is approved.
Use this handover for your 2026 installation schedule: cabinet completion means the kitchen is ready for the next trade, not merely that the boxes have arrived.
Benchtop and wall preparation
The benchtop establishes the finished lower reference for the splashback. The wall establishes whether the tiles have a suitable surface to bond to. Both need checking before adhesive is mixed.
- Fit and accept the benchtop. Confirm its final position, joins, cut-outs and exposed edges with the installer. Resolve defects before covering the adjoining wall.
- Protect finished surfaces. Cover the benchtop and adjacent cabinets with suitable protection. Keep abrasive tile fragments and tools off finished surfaces.
- Inspect the wall. Check for loose paint, damaged lining, moisture, grease and old adhesive. Removing an existing splashback can expose damage that was not visible beforehand.
- Prepare the substrate. Have unsuitable material removed or repaired. Confirm that the repaired surface and any required primer are compatible with the selected adhesive system.
- Confirm moisture protection. Resolve leaks and any specified waterproofing work before tiling. Do not conceal a damp or deteriorated wall behind a new finish.
Expected result: the benchtop is in its final position and the wall is sound, suitably flat and ready for the selected tiling system.
Keep 3 handover checks on the job sheet: benchtop accepted, wall accepted and services confirmed. These checks are a practical release point for tiling, not a substitute for product instructions or required inspections.
The sequence below shows the physical dependencies. Each stage gives the next trade a finished reference rather than an estimate.
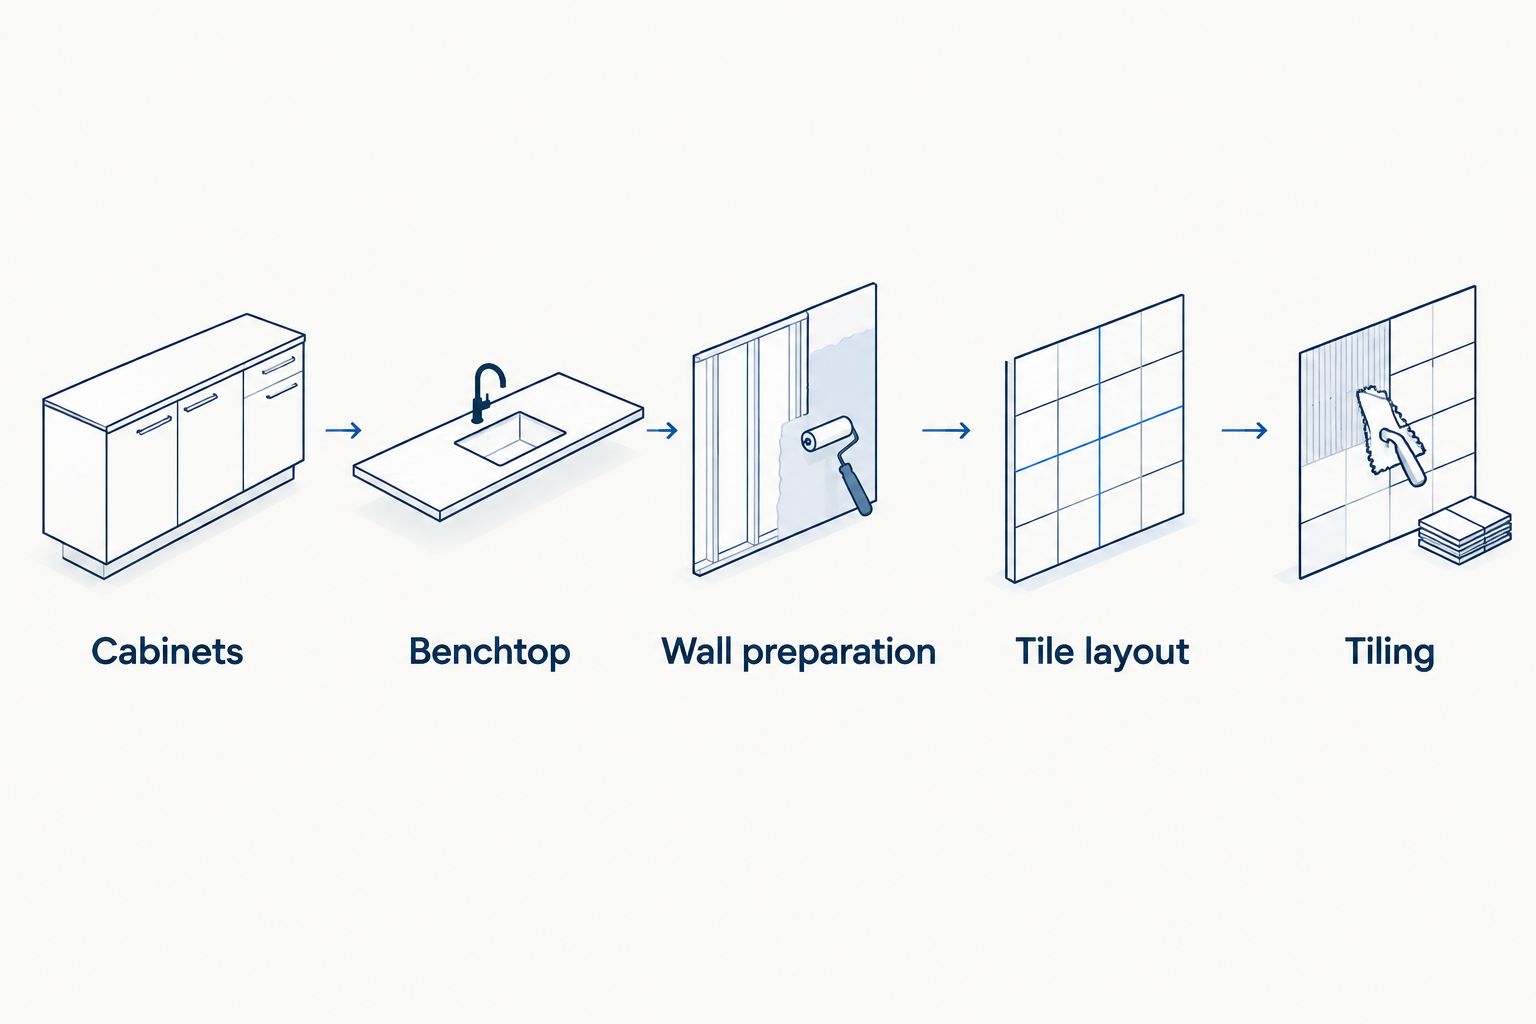
Tile layout and fixing
Approve the layout before installation, especially around the rangehood and visible ends. A pattern that looks balanced on a sample board can finish awkwardly against actual cabinets.
- Measure the finished space. Take dimensions from the installed benchtop and fixed cabinetry. Include returns, corners, outlets and any area behind the rangehood.
- Establish 2 layout lines. Mark a horizontal reference and a vertical reference. The tiler should check the benchtop rather than assume it is a level setting-out guide.
- Check the visible cuts. Dry-lay representative tiles with the intended joints. Review cuts at cabinet ends, corners, outlets and the top edge before fixing anything.
- Approve the edge treatment. Decide how exposed tile edges will finish. Confirm trim position before tiling, not after an unfinished edge becomes visible.
- Fix the tiles. Use the preparation, adhesive application and coverage required for the selected tile and substrate. Keep movement joints and changes of plane consistent with the specified system.
Expected result: the installed tiles follow 1 approved layout, with agreed cuts and finished edges. Power-point openings remain suitable for the electrician to complete the fittings.
For a patterned splashback, use the guide to tile patterns for small kitchen splashbacks before approving the set-out. Pattern choice affects where partial tiles land; it does not change the cabinets-first sequence.
In a 2026 kitchen plan, record the layout approval alongside the selected tile. A written selection alone does not explain whether the pattern should centre on the cooktop or continue evenly along the wall.
Grout, flexible joints and final fit-off
The splashback is not finished when the final tile is fixed. Adhesive curing, grouting, flexible joints and service fit-off each need their own place in the schedule.
- Allow the adhesive to cure. Follow the selected product’s instructions and site conditions. Do not promise a universal next-day handover.
- Grout the tile joints. Use grout suited to the tile and application. Confirm cleaning requirements, especially where a textured surface can retain residue.
- Complete flexible joints. Use the specified compatible flexible sealant at the benchtop junction and other required movement locations. Do not automatically fill every junction with rigid grout.
- Arrange service fit-off. Have the electrician refit outlets and complete the necessary checks. Relevant licensed trades must handle plumbing or gas work affected by the renovation.
- Check and hand over. Inspect tile edges, joints, outlet surrounds and cleanliness. Obtain product-specific guidance on curing, cleaning and any sealing requirements.
Expected result: the splashback is finished, services are safely completed and the household knows when normal use and cleaning can begin.
For Melbourne Tiling Group splashback tiling, agree who supplies tiles, who prepares the wall and who completes the junction sealant before accepting the scope. Clear responsibilities make quotes easier to compare without relying on the lowest headline figure.
Second workflow: replace the splashback, retain the cabinets
You do not need new cabinetry simply to replace a tiled splashback. Keep existing cabinets and benchtops when they are sound, staying in position and suitable for the planned work. The limitation is access: removal can damage the wall or adjoining finishes.
| Workflow | Best for | Main advantage | Main limitation |
|---|---|---|---|
| New cabinets, then splashback | Full kitchen renovations | Sets tile boundaries from finished cabinetry and benchtops | Tiling depends on earlier installations being complete |
| Retained cabinets, new splashback | Kitchen updates without layout changes | Keeps suitable existing joinery in place | Removal and repairs must work around finished surfaces |
For a splashback-only update in 2026, follow this shorter sequence:
- Confirm the cabinets and benchtop will remain unchanged.
- Arrange safe isolation or disconnection of affected services.
- Protect the joinery and remove the old splashback carefully.
- Inspect and repair the exposed wall.
- Follow the layout, fixing, grouting and fit-off steps above.
Do not assume tiling over the old splashback is suitable. The existing bond, surface condition, added thickness and effect on outlets and edges all need assessment.
Troubleshooting
The benchtop is not level
Stop and check the cause before setting the first row. Ask the cabinet and benchtop installers to assess the installation. The tiler can plan cuts against an accepted surface, but tiles should not hide a defect that still needs correction.
Splashback removal tears the wall lining
Repair the substrate before tiling. Torn facing, loose sections and soft areas are not a sound bonding surface. Reassess the preparation scope after removal instead of treating the damage as something adhesive will solve.
Tile thickness changes the power-point fit
Have the electrician assess the finished wall depth. Supply the tile and adhesive build-up information before fit-off. Do not leave faceplates poorly seated or attempt electrical alterations yourself.
A narrow cut appears beside the rangehood
Review the whole set-out before shifting individual tiles. Check whether adjusting the starting position improves both ends and the cooktop area. Get approval for the revised layout before fixing resumes.
The benchtop junction cracks
Check the junction detail rather than repeatedly adding grout. A rigid joint cannot perform the same role as a specified flexible joint. Have the installer assess movement, adhesion and the correct repair before resealing.
Customise your workflow
Start with the sequence, then adjust the finish details. Large tiles, mosaics and natural stone need different preparation and finishing decisions; the cabinet and benchtop handover still comes first.
For a kitchen-to-laundry renovation, give each room its own substrate and moisture assessment. Bathroom waterproofing requirements should not be reduced to a kitchen splashback detail, and a kitchen wall should not inherit an unrelated specification.
Ask Melbourne Tiling Group to separate wall preparation, tile installation and finishing responsibilities in the kitchen tiling scope. Keep electrical work, cabinet adjustments and benchtop repairs clearly assigned rather than assumed.
FAQ
Should I install cabinets before or after splashback tiling?
Install cabinets before splashback tiling in a standard kitchen renovation. Fit the benchtop as well, then measure and set out the tiles against the finished surfaces.
Does the benchtop go in before the tiled splashback?
Yes, the benchtop normally goes in before the tiled splashback. Its final position establishes the lower boundary and the junction detail for the tiles.
Can I replace my splashback without replacing the cabinets?
Yes, you can retain suitable cabinets and benchtops while replacing the splashback. Protect the existing finishes and inspect the wall after removal before confirming the preparation work.
Should splashback tiles go behind wall cabinets?
A standard splashback usually finishes against installed wall cabinets rather than covering the wall behind them. Full-height tiled walls and special design details need an agreed sequence before cabinet installation.
How long should I wait before grouting a splashback?
Follow the selected adhesive manufacturer’s curing instructions before grouting. Tile type, substrate and site conditions affect the timing, so a fixed waiting period does not suit every installation.
Does a kitchen splashback need waterproofing like a shower?
A kitchen splashback does not automatically use the same waterproofing detail as a shower. Confirm the wall’s exposure, substrate and applicable requirements before choosing the protection system; tiles and grout alone are not a waterproofing membrane.
Can the tiler move kitchen power points?
Electrical alterations must be handled by a licensed electrician. Coordinate outlet positions before tiling and arrange electrical fit-off after the finished wall depth is established.
One last thing
Before approving your 2026 splashback layout, stand at the kitchen entrance and check the most visible tile edge. A layout centred on the cooktop can still leave an awkward cut at an exposed end. Approve the whole wall, not just the feature area.


