

Instead of chasing trades each day, set your builder handover to tiling timeline around written readiness checks, then release each room only when preparation, waterproofing and access are confirmed. This 2026 workflow shows you how to coordinate the builder, tiler and follow-on trades without treating a proposed start date as permission to lay tiles.
- Build your builder handover to tiling timeline around readiness checks, not a fixed countdown.
- Melbourne Tiling Group provides wall and floor tiling for Melbourne homeowners and construction companies.
- Release wet areas only after waterproofing requirements, curing and inspection records are resolved.
- Record separate dates for tiling, permitted foot traffic and follow-on trades.
Why this matters
A builder handing a room over to a tiler is not the same as the builder handing a finished home over to you. Here, handover means transferring a work area for floor preparation and tile installation. Practical completion and contractual possession are separate matters.
For your 2026 renovation, a tidy room is not enough. The floor needs to suit the selected installation system, and wet-area work needs the correct preparation and waterproofing sequence. Booking the tiler before those conditions are met creates a scheduling conflict rather than a workable programme.
Melbourne Tiling Group is best suited to Melbourne homeowners and construction companies seeking wall and floor tiling installation. You can use the Melbourne Tiling Group service information when defining the tiling scope, then agree project-specific responsibilities in writing.
Before you start
- Gather the job information. Have the room plan, tile selection, proposed layout, finished floor levels, drainage details where relevant, and the builder's current programme. Include access arrangements for your south-east Melbourne property.
- Name the decision-makers. Record who approves floor preparation, who handles waterproofing, who accepts layout changes and who controls site access. Homeowners need the same clear responsibilities as construction companies.
- Resolve the hidden gotcha: finished height. Tile thickness is only part of the floor build-up. Preparation, screed, adhesive and any heating system affect door clearance, drainage and adjoining floors. Confirm the proposed build-up before releasing the room.
Create a shared worksheet with the headings below. These are suggested project fields, not buttons or settings in a particular app. A document, spreadsheet or printed sheet works if everyone uses the same version.
Site readiness record
Confirm the room and scope
- Create a separate entry for each work area. Use recognisable names such as bathroom, laundry, kitchen or living room, rather than a single whole-house entry.
- Add the fields Area, Work included, Responsible person, Proposed start and Release status. Keep the proposed date separate from the decision that the area is ready.
- Record what the tiler is expected to receive. Include demolition completion, waste removal, secure access, usable lighting and agreed arrangements for water and power.
- List unfinished work that affects the floor. Examples include plumbing positions, door frames, floor repairs and services passing through the tiling area.
- Mark the room as not released until the relevant trades confirm their work is ready for the next stage.
Expected result: everyone can identify the exact area being handed over, the work included and the person authorised to release it.
Keep exclusions visible. If skirting removal, appliance movement or disposal is outside the agreed scope, assign it before the start date. An unassigned task does not disappear when the tiler arrives.
Floor preparation and waterproofing record
Confirm the floor build-up
- Add Substrate condition, Preparation required, Finished level and Product instructions to the room record. Substrate means the surface that will support the tiling system.
- Ask the installer to assess contamination, movement, cracks and surface suitability. Do not treat a clean-looking slab or sheet floor as automatic approval for tile installation.
- Confirm preparation and any screed or levelling work before setting the installation date. Record who completes that work and who checks it.
- For bathrooms and other wet areas, confirm the required waterproofing details, drainage arrangement and inspection or documentation requirements with the responsible contractor. Record any hold point before work is covered.
- Check compatibility across the selected preparation, waterproofing and adhesive products. Follow the relevant manufacturers' instructions for application and curing conditions.
- Confirm that the proposed finished floor works at doorways, adjoining rooms and floor wastes before approving the build-up.
Expected result: the floor preparation and wet-area requirements are resolved before tile laying receives a confirmed release.
For a 2026 bathroom project, do not copy curing periods from an unrelated renovation. Products and site conditions differ. The guide to tile adhesives for wet-area installations provides further context for discussing the installation system with your tiler.
Tiles and grout do not replace a waterproofing system. Keep waterproofing checks separate from decisions about tile colour, grout appearance and surface finish.
Installation release and trade booking
Approve the layout and release the room
- Add Layout approved, Materials checked, Access clear and Installation release to the room record. Assign a person to each approval.
- Review the tile layout before fixing begins. Check visible cuts, doorway transitions, alignment with walls and the treatment of edges or changes in surface.
- Confirm that the required materials are on site, checked and suitable for the agreed work. Resolve damaged tiles, mixed selections or missing trims before installation starts.
- Confirm the room is clear of competing trades. Give the installer uninterrupted access to the work area and agree where materials can be handled without damaging finished surfaces.
- Approve the installation release only when the earlier preparation and waterproofing requirements are satisfied. Replace the proposed start with the confirmed booking after that decision.
Expected result: the tiler receives an approved layout and a ready work area, rather than a date surrounded by unresolved tasks.
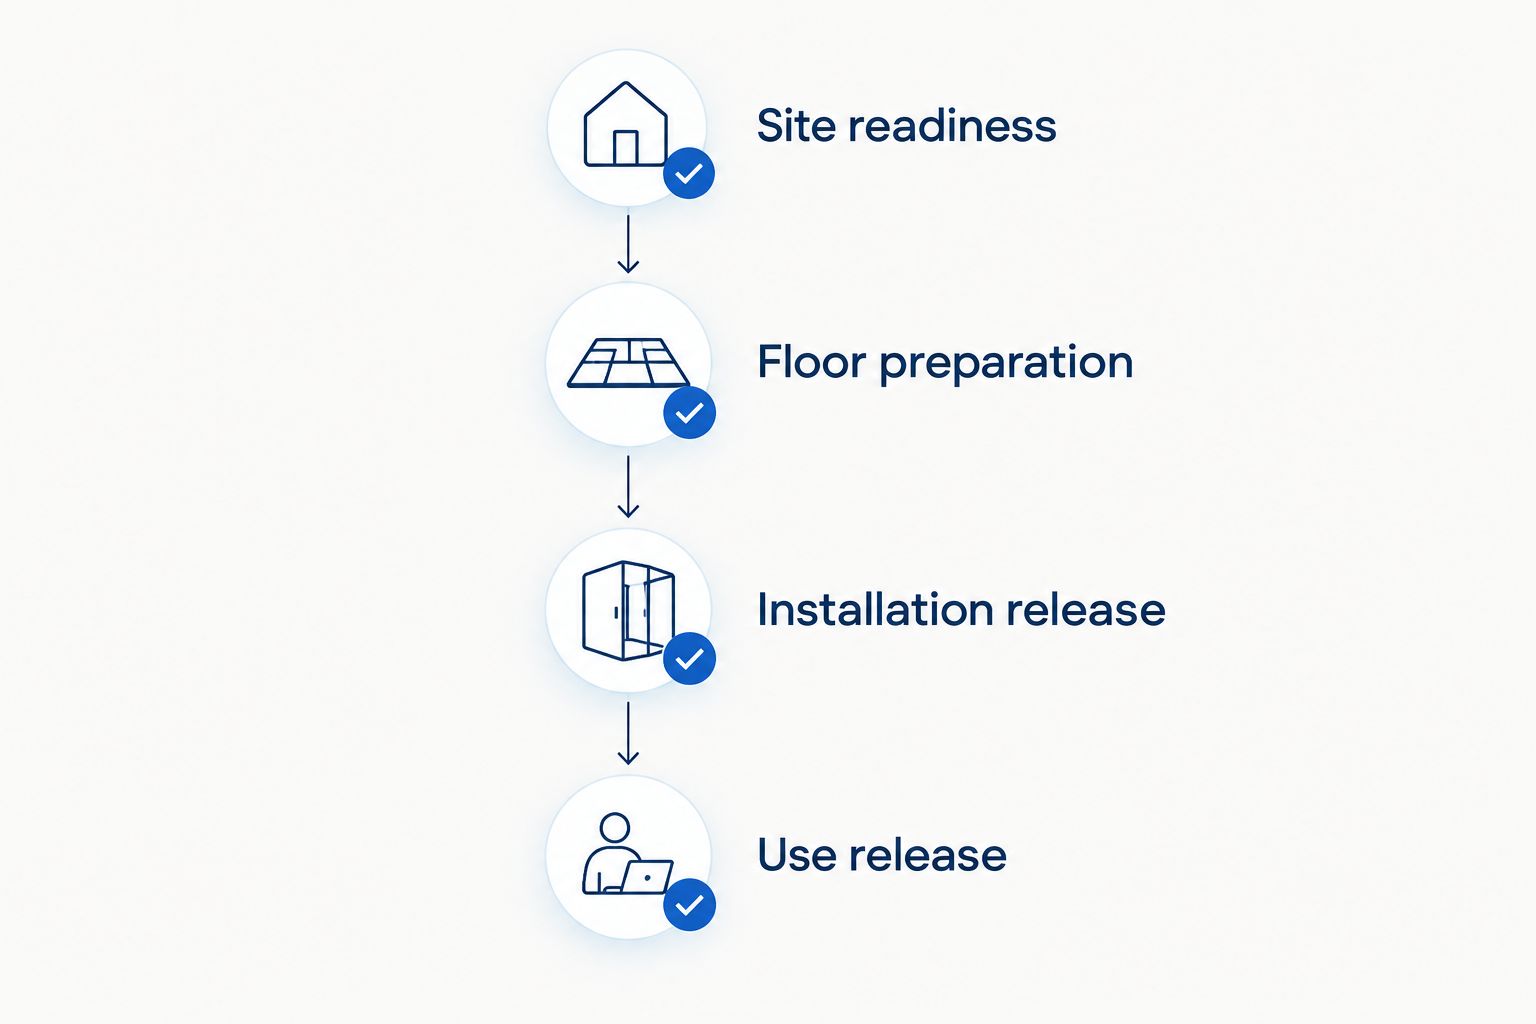
Use these 4 checkpoints in your 2026 programme: Site readiness, Floor preparation, Installation release and Use release. Each checkpoint answers a different question; none should be assumed from the previous booking alone.
A layout approval is also the right time to discuss value. Keeping an agreed layout stable avoids changing instructions after cutting or fixing has begun. Ask for preparation and finishing tasks to be described clearly so you can compare scopes, not just headline quotes.
Curing, protection and use release
Record when each activity can restart
- Add Grouting release, Foot traffic release, Follow-on trade release and Wet-use release where relevant. Do not put every activity under a single completion date.
- Ask the installer to record the applicable waiting periods from the selected product instructions. Include any conditions that affect those periods, rather than assuming every site behaves the same way.
- Confirm when grouting, flexible joints and other finishing work can proceed. Keep movement joints and required flexible joints separate from ordinary grout joints.
- Agree how finished tiles will be protected before other trades return. Confirm that the protection method suits the floor and does not conflict with curing requirements.
- Give follow-on trades written access conditions. Include restrictions on loads, equipment and wet use where the installation requires them.
- Complete a joint inspection and record defects or unfinished work before removing the area from the active programme.
Expected result: the builder and homeowner know which activities are permitted, rather than assuming a finished-looking floor is ready for everything.
At minimum, record 3 separate release dates: tile installation, permitted foot traffic and follow-on trade access. A bathroom also needs an explicit wet-use instruction. These are planning fields, not promised turnaround times.
For your 2026 handover, ask Melbourne Tiling Group to confirm the tiling scope and project-specific access requirements before you lock in dependent work.
Plan your floor tiling handover
Define the installation scope and discuss preparation, access and finishing requirements.
Release rooms in stages when other work continues
A staged handover suits a renovation where some rooms are ready and others remain active. A whole-area handover suits a cleared work zone with coordinated access. Choose the approach that matches the site, not the one that produces the earliest-looking start date.
| Handover approach | Best for | Practical benefit | Limitation |
|---|---|---|---|
| Whole-area release | Best for cleared, connected floor areas | Makes continuous layout and access planning easier | Unfinished work in a critical area can hold up the release |
| Room-by-room release | Best for renovations with separate work zones | Lets ready rooms progress independently | Needs tighter control of thresholds, protection and trade routes |
For a 2-room example, treat a bathroom and laundry as separate release records. The laundry being ready does not prove the bathroom waterproofing is ready. Equally, unfinished bathroom work should not automatically stop an independent laundry installation.
Before staging connected floor areas, ask the installer to confirm how tile alignment, finished levels and joints will be maintained. Keep a safe route for workers that does not cross a floor before its access release.
Choose staged handover only when the work areas can genuinely operate separately. A room is not independent if every other trade must walk through it.
Troubleshooting the handover timeline
The builder says ready, but preparation is unfinished
Keep Release status as not released and identify the outstanding task. Name the person responsible and update the dependent bookings after the work is checked. Do not use the tiler's arrival as a substitute for preparation approval.
Waterproofing records or approvals are unresolved
Pause the affected wet-area installation before covering the work. Ask the responsible contractor to resolve the required checks and documentation for that project. Photographs help record progress but do not replace required inspections or approvals.
The tiler finishes, but other trades need immediate access
Check the written access release against the installation instructions. Reschedule the trade or agree a suitable alternative work route. Protective covering is not permission to ignore curing or loading restrictions.
Doorways or adjoining floors no longer line up
Stop before fixing tiles through the affected transition. Recheck the complete floor build-up, door clearance and adjoining finish with the builder and installer. Do not assume a trim will solve a level problem.
A late tile or layout change affects the booking
Return the layout and materials checks to unresolved. Ask the installer to review preparation compatibility, cutting, edge details and the revised scope before confirming a replacement installation release.
Customise your workflow
Keep the same release method, but change the checks to suit the surface. For a kitchen splashback, confirm the relationship between cabinetry, benchtop, power points and finished tile edges. Do not reuse a bathroom floor checklist without removing irrelevant items.
For natural stone paving, discuss the supporting base, drainage, joints and the stone's specific installation and care requirements. An outdoor paving programme is not an indoor floor programme moved outside.
For Melbourne Tiling Group wall and floor tiling projects, bring room plans and finish selections into the scope discussion. Homeowners in Melbourne's south-east can also record access restrictions, parking arrangements and occupied areas so those details are settled before work begins.
Keep scope changes attached to the room record. A text message approving a different finish needs to reach the person responsible for layout, preparation and scheduling.
FAQ
How long is the builder handover to tiling timeline?
The builder handover to tiling timeline depends on site readiness, preparation, waterproofing and the selected installation products. Confirm those requirements before setting the tiling date, then record separate permissions for foot traffic, follow-on trades and wet use.
Does builder handover mean my home is finished?
A handover to the tiler means releasing a work area for the next trade, not handing over a completed home. Contractual handover and practical completion are separate matters.
Can the tiler start as soon as the screed looks dry?
Appearance alone does not confirm that screed is ready for tiling. The installer needs to assess readiness against the specified system and applicable product instructions.
Should waterproofing be checked before bathroom tiles go down?
Resolve the required waterproofing checks and documentation before tiles cover the work. Confirm project-specific responsibilities and any inspection hold points with the responsible contractor.
Can I tile one room while the builder works in another?
A staged handover works when the rooms have separate access and the remaining work will not damage or interfere with the tiling. Agree levels, layout continuity and protection before releasing connected areas separately.
When can plumbers and other trades return after floor tiling?
Other trades can return when the recorded access conditions permit their work. Permission for light foot traffic does not automatically permit equipment, concentrated loads or wet use.
What should I send Melbourne Tiling Group before discussing floor tiling?
Send the room plan, tile selection, proposed scope, site access details and the builder's current programme. Include known preparation, drainage and waterproofing requirements so the discussion covers more than the laying date.
One last thing
The most useful date in a tiling programme is often the date another trade is allowed back in. A floor can look finished before it is ready for that activity. For your 2026 project, make the use release as visible as the installation booking.


