
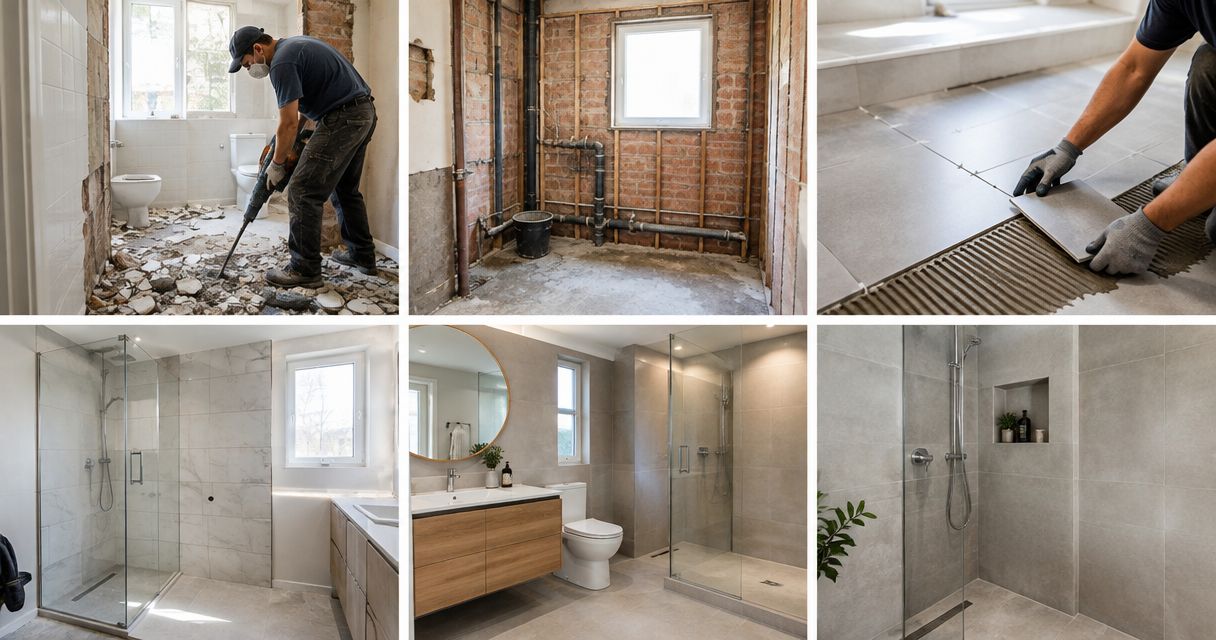
Instead of coordinating demolition, waterproofing and tiling as separate jobs, plan your demolition to new tiles renovation as one staged workflow: agree the layout, expose and repair the structure, waterproof, then tile and fit off. For your 2026 bathroom project, this sequence keeps unfinished work from being covered by the next trade.
- A demolition to new tiles renovation needs substrate repairs and waterproofing before tile installation.
- Melbourne Tiling Group suits homeowners seeking bathroom wall and floor tiling, not a substitute for licensed plumbing or electrical work.
- Approve drainage, floor heights and waterproofing details before covering them.
- Keep the bathroom unused until installation materials meet their specified curing requirements.
Why this matters
Bathroom finishes hide the work that matters most. Sound backing, drainage and waterproofing need attention before the first tile goes down; grout cannot compensate for defects underneath.
Melbourne Tiling Group is best for Melbourne homeowners seeking residential wall and floor tiling services. Start your discussion with Melbourne Tiling Group by describing the existing bathroom, proposed layout and work other trades will handle.
For a 2026 renovation, put responsibilities in writing before demolition. Do not assume the tiling scope includes plumbing, electrical work, structural repairs or waterproofing simply because those tasks sit beside tiling on the schedule.
Before you start
- Prepare one written scope. Include the layout, fixtures, tile selections, demolition boundaries and responsibility for each trade. Confirm any building approval, owners corporation or access requirements that apply to the property.
- Arrange safe access and isolation. Licensed trades must handle relevant plumbing and electrical work. Organise another washing arrangement, protect the route through the house and agree how rubble leaves the property.
- Check concealed-material risks before demolition. Older bathrooms can contain asbestos in backing sheets or other materials. Do not drill, sand or break suspect material; arrange assessment and appropriate removal before ordinary demolition starts.
For a south-east Melbourne home, also discuss driveway access, shared entrances and where materials can sit without blocking the household. These details belong in the plan, not in a conversation after demolition begins.
Scope and demolition
Agree the layout and strip-out boundaries
- Confirm fixture positions. Mark the shower, toilet, vanity, floor waste and door swing on a plan. Decide whether plumbing stays in place before asking trades to sequence their work.
- Confirm the finished build-up. Ask the tiler and plumber to coordinate tile thickness, adhesive, screed and waste details. Include adjoining floor levels and the shower screen arrangement.
- Define what stays. Identify retained fittings, walls, doors and surfaces. Photograph their condition and label anything being stored for reuse.
- Isolate services and remove finishes safely. Have the relevant trades isolate services before strip-out. Remove nominated fixtures, tiles and unsuitable backing without treating concealed pipes or cables as predictable.
- Inspect the exposed bathroom. Check for damaged framing, deteriorated flooring, leaks and unsuitable previous repairs before approving the next stage.
Expected result: an exposed bathroom with known repair needs, safe services and an agreed layout. Demolition is not complete merely because the old tiles have gone.
Keep photographs of exposed conditions in your 2026 renovation file. Record decisions about hidden damage separately from the original scope so everyone knows what changed and why.
The practical saving here is clarity. Keeping a layout only makes sense when the existing arrangement works and the underlying services are suitable; retaining a defect is not value.
Substrate, services and waterproofing
Prepare the structure and service rough-in
- Repair the base. Have damaged framing, flooring and wall backing assessed and repaired by the appropriate trade. Do not tile over movement, damp deterioration or loose sheets.
- Complete concealed services. Coordinate plumbing and electrical rough-in before closing walls. Confirm fixture locations against the actual fittings rather than relying on an approximate drawing.
- Check backing suitability. Confirm the substrate suits the selected wet-area system and tile installation. Follow the relevant installation requirements for fixing, joints and preparation.
- Resolve drainage and thresholds. Agree where falls are formed and how the waterproofing connects to wastes, junctions and the doorway. The order of screeding and membrane installation depends on the specified system.
Expected result: a sound, prepared base with services in the correct positions and a documented drainage approach. Stop here if floor levels or waste connections remain unresolved.
Complete and protect the waterproofing
- Confirm the system. Specify compatible primers, membranes, junction treatments and waste details. Mixing unrelated materials without confirmed compatibility introduces an avoidable risk.
- Apply the specified preparation and membrane. The installer must follow the system instructions and applicable requirements, including treatment around corners and penetrations.
- Observe curing and inspection requirements. Confirm any required inspections or testing with the responsible practitioner. Do not substitute a guessed waiting period for the manufacturer's instructions.
- Approve the handover to tiling. Check that the membrane is ready to receive the specified adhesive and protect it from damage during subsequent work.
Expected result: completed waterproofing with the relevant records and a clear release for tiling. Tiles and grout are finishes, not replacements for a waterproofing system.
For material-selection questions, read the guide to waterproofing membranes for shower renovations. Confirm suitability against the complete installation system rather than choosing a membrane in isolation.
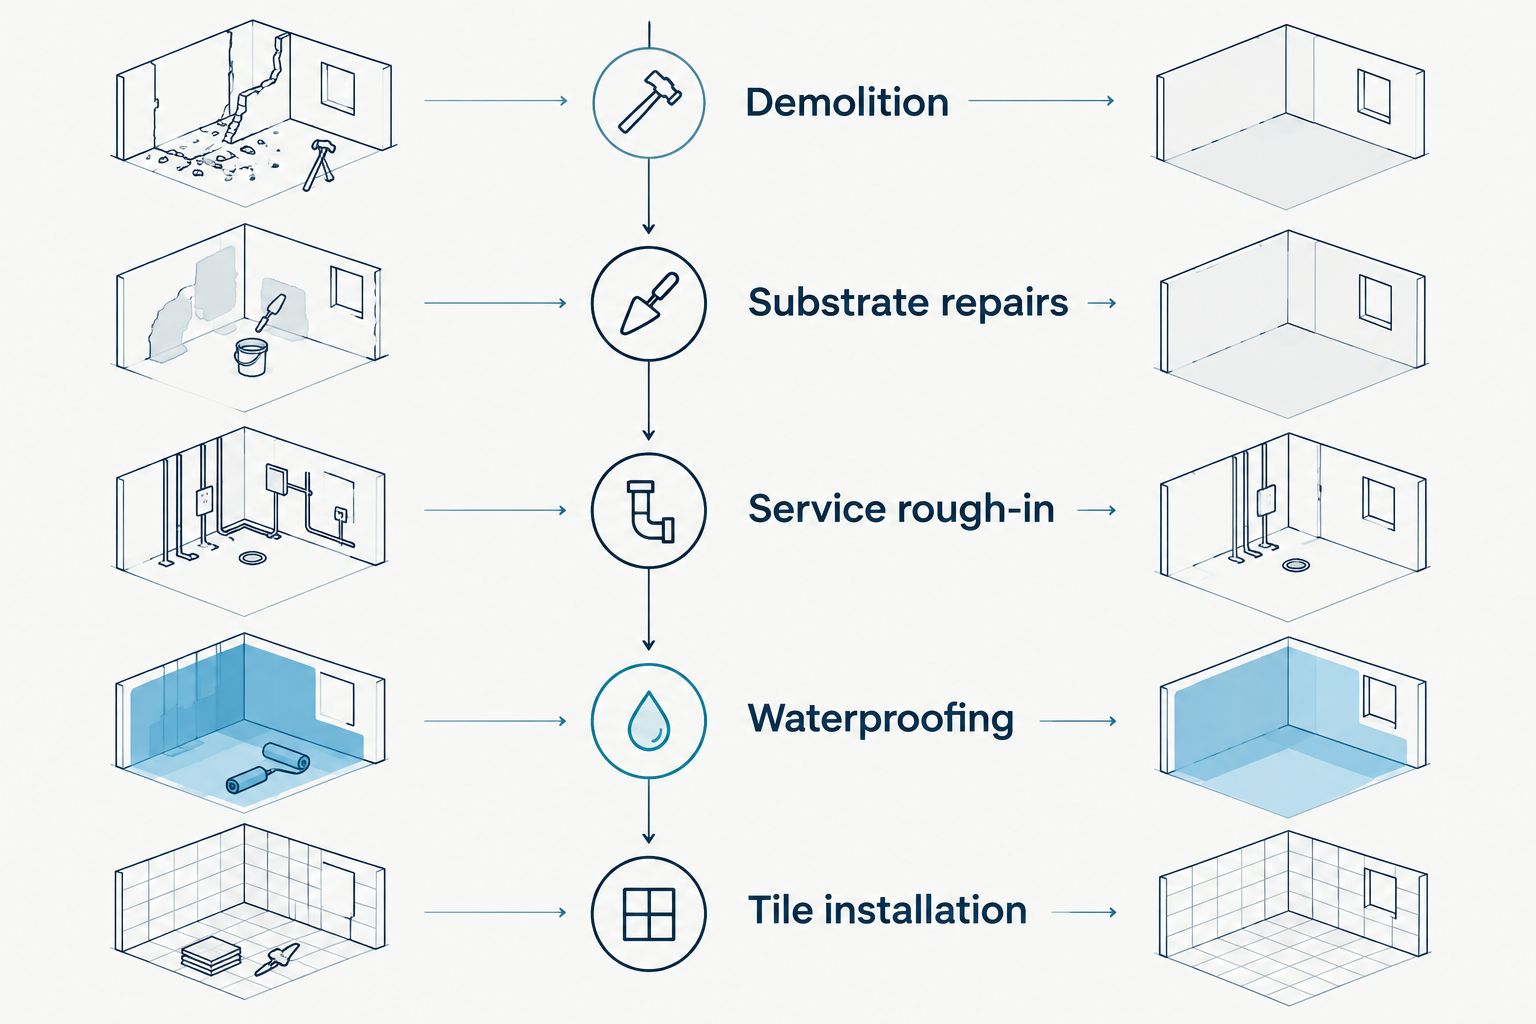
Mark 2 hold points in the schedule: approval of the exposed structure after demolition, and approval of the waterproofing before tiling. These are project checks, not substitutes for required statutory inspections.
Tile layout, installation and handover
Approve the tile set-out
- Check the selected tiles. Confirm suitability for the intended wall or floor location, wet use and cleaning routine. Check delivered tiles for visible damage and unexpected variation before installation.
- Review the set-out. Ask the tiler to show the main joint lines and cuts around the shower, vanity, doorway and floor waste. Decide where full tiles matter most.
- Resolve edges and junctions. Confirm trims, exposed edges, niches and transitions before cutting starts. Leave movement-joint locations to the installation design rather than filling every junction with grout.
- Approve the layout before fixing. Record agreed grout colour, joint appearance and tile direction. A small sample arrangement helps reveal an awkward cut while it is still easy to change.
Expected result: a clear set-out that fits the bathroom rather than a pattern improvised around obstacles.
Large tiles reduce the number of grout joints, but they require suitable surface preparation and careful planning around drainage. Smaller tiles introduce more joints but can accommodate changes in plane more readily. Neither format excuses poor preparation.
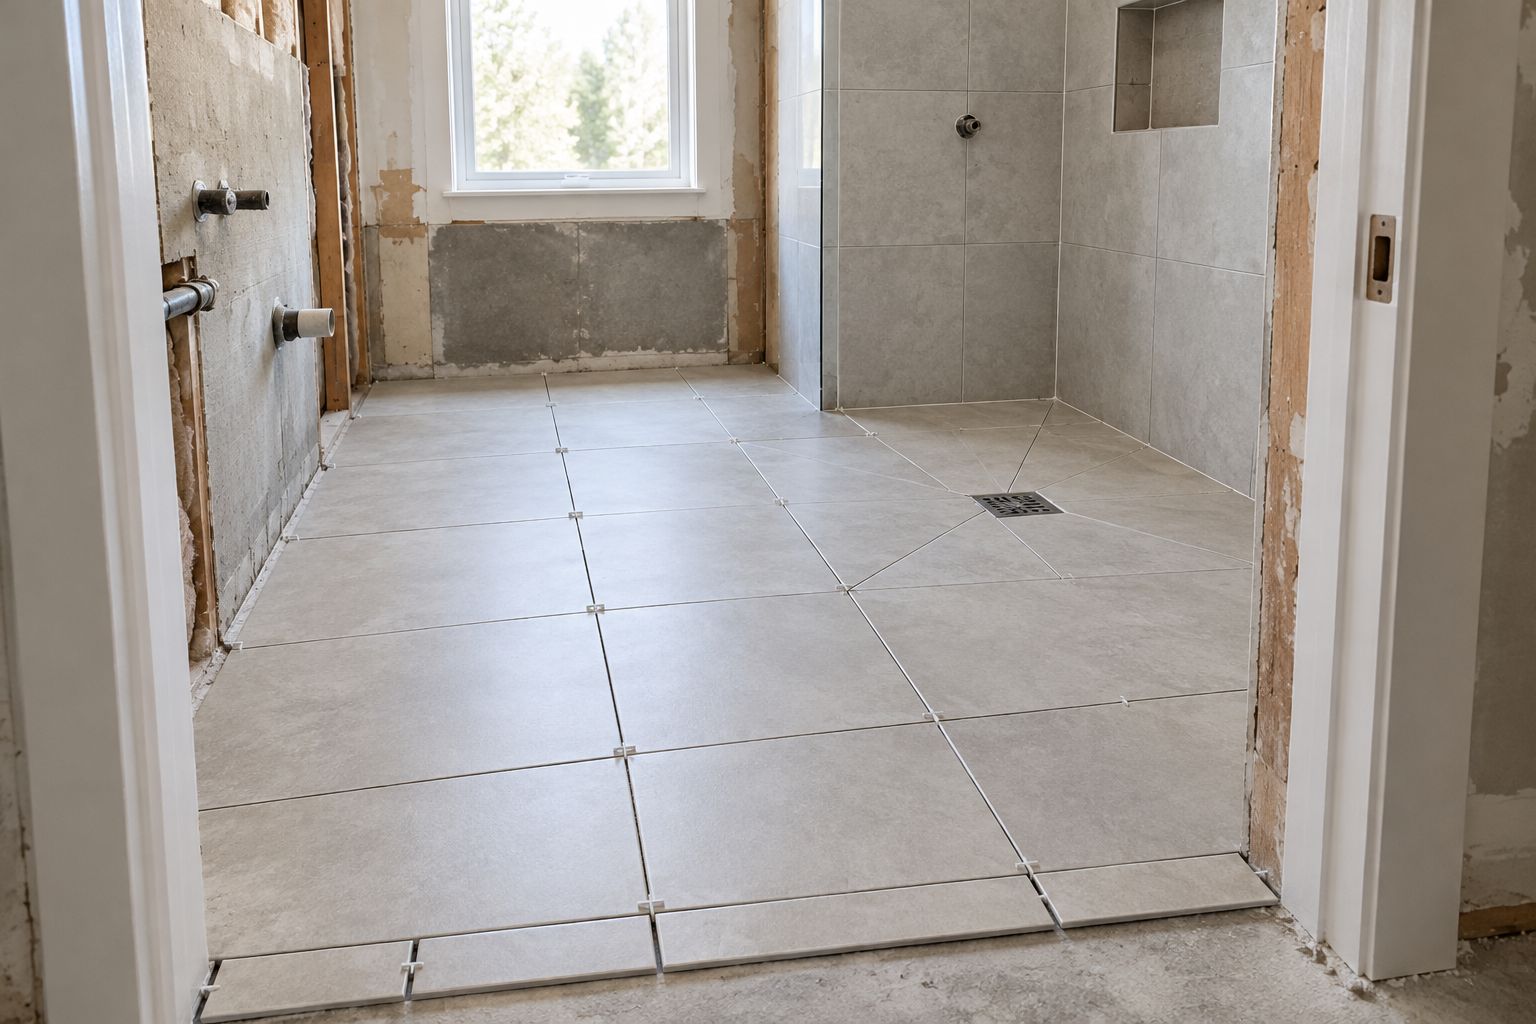
Complete fixing and final checks
- Install with compatible materials. Use adhesive suited to the tile, substrate and waterproofing system. Follow installation instructions for preparation, coverage and working conditions.
- Allow the installation to cure. Keep traffic and later trades off the work until the specified conditions are met. Do not let a delivery date determine when grouting starts.
- Grout and seal the correct joints. Use the specified grout and flexible joint treatment in their intended locations. Confirm any sealing requirements for natural stone before cleaning or use.
- Coordinate fit-off. Have fittings and screens installed without unplanned damage to the waterproofing. Resolve penetrations with the relevant installer before drilling.
- Inspect and hand over. Check finishes, junctions, drainage and cleaning instructions. Agree how any defects will be recorded and addressed.
Expected result: a finished bathroom with completed trade work, agreed checks and clear instructions for first use. Melbourne Tiling Group's bathroom tiling scope should be agreed separately from other trades' fit-off responsibilities.
Alternative workflow: a tile-only bathroom refresh
A tile-only refresh keeps the existing layout and limits other changes. It is not permission to assume the waterproofing remains sound after old tiles are removed.
For a 2026 refresh, arrange an assessment before committing to the smaller scope. Removing tiles can damage the backing or membrane, changing the work required.
| Workflow | Best for | Main advantage | Main limitation |
|---|---|---|---|
| Full bathroom renovation | Homeowners changing the layout or addressing underlying defects | Provides access to concealed structure and services | Requires more trade coordination and a wider scope |
| Tile-only refresh | Homeowners retaining a suitable layout and service arrangement | Limits planned changes to the existing bathroom | Removal can expose damage that requires further work |
For the tile-only workflow, retain the same decision gates: inspect after removal, confirm the substrate and waterproofing approach, approve the set-out, then install. Do not tile over an unresolved leak to preserve a smaller scope.
Ask Melbourne Tiling Group to define the wall and floor tiling work after the bathroom's condition is assessed. Keep responsibility for any additional investigation or repairs explicit.
Troubleshooting
Hidden damage appears after demolition
Stop the affected work and document the condition. Have the relevant trade assess the cause, repair requirements and effect on the agreed scope before replacing backing or laying tiles.
The new floor level conflicts with the doorway
Recheck the complete floor build-up and adjoining surfaces before waterproofing or tiling continues. Coordinate the threshold, drainage and door clearance; do not solve the problem by arbitrarily reducing specified material layers.
The waterproofing is damaged during later work
Keep the affected area accessible and notify the responsible installer. Obtain a system-compatible repair and any required checks before covering it; adhesive is not a membrane repair.
Water remains in an unwanted area
Have the tiler and plumber assess the falls, waste connection and finished surface. Grout changes do not correct a wrongly formed floor, so establish the cause before attempting cosmetic repairs.
The tile pattern produces narrow cuts
Pause before fixing the affected area and adjust the set-out. Compare the doorway, main sightline and shower junctions together rather than improving one edge at the expense of every other edge.
Customise your workflow
Add heated flooring, a shower niche or natural stone at the planning stage, not after waterproofing. Each choice affects the build-up, junction details, material compatibility or maintenance requirements.
For natural stone, confirm sealing and cleaning instructions before approving the selection. For a niche, agree its position with framing, services and tile joints before the wall is closed.
Keep 3 records together: the agreed scope, photographs of concealed work, and installation or care documents. These support later maintenance without relying on memory.
Plan your bathroom tiling scope
Discuss wall and floor tiling alongside your demolition, waterproofing and trade schedule.
FAQ
What is the correct order for a demolition to new tiles renovation?
Agree the scope, isolate services, demolish, inspect and repair, complete concealed services, waterproof, then tile and fit off. The screed and membrane sequence must follow the specified waterproofing system.
Can I keep the old waterproofing when replacing bathroom tiles?
Do not assume old waterproofing can remain serviceable after tile removal. Have its condition, compatibility and repair options assessed before proceeding with the new installation.
How long should waterproofing dry before tiling?
Follow the waterproofing manufacturer's specified curing requirements before tiling. Product type, application and site conditions affect the release time, so a generic waiting period is not a reliable instruction.
Should I choose tiles before demolition starts?
Choose the intended tiles before demolition so the team can plan thickness, layout, transitions and drainage details. Confirm the final set-out after the bathroom has been exposed and prepared.
Can Melbourne Tiling Group handle my bathroom wall and floor tiling?
Melbourne Tiling Group provides residential bathroom wall and floor tiling services. Confirm the project scope and responsibility for demolition, plumbing, electrical work and waterproofing before booking the sequence.
Can I use the shower as soon as the grout looks dry?
No; surface appearance does not confirm that the installation is ready for shower use. Follow the specified curing and first-use instructions for the grout, sealants and other installation materials.
One last thing
Photograph the bathroom before the finishes hide the useful details. In your 2026 project records, include service positions, repaired backing and completed waterproofing, without disturbing the work to obtain a photograph.
A finished tile surface cannot show where every pipe runs or how a concealed junction was treated. Keep those records with the care instructions, not buried in a message thread.


