
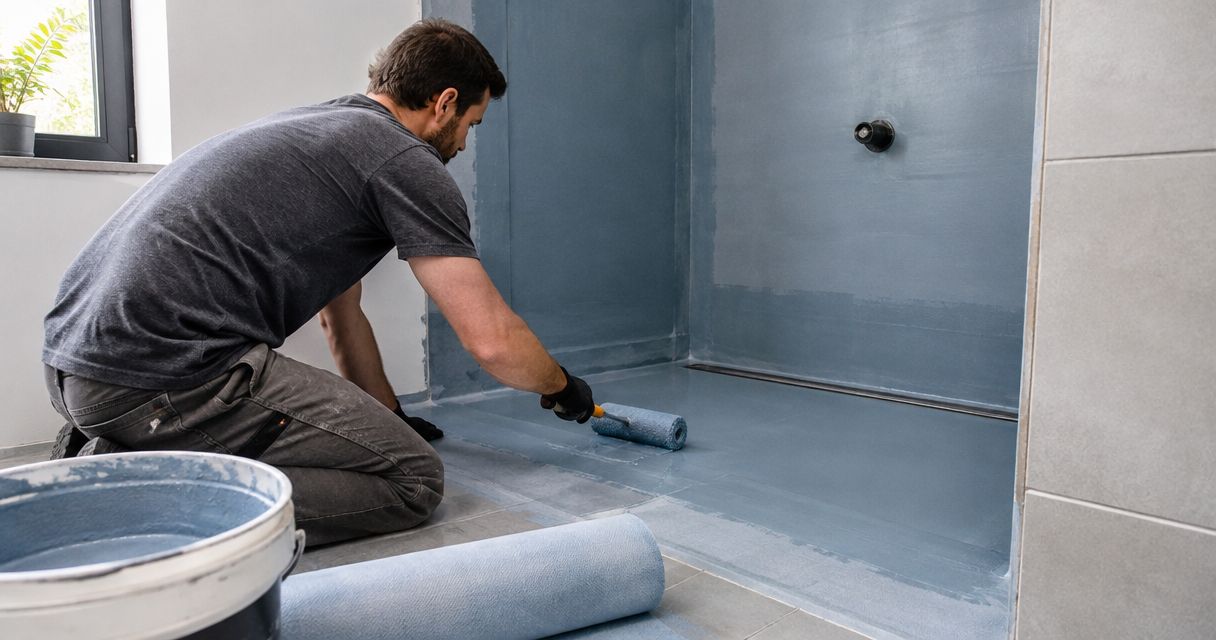
To waterproof a shower before tiling, prepare a sound substrate, establish the drainage falls, seal junctions and penetrations, then install a compatible waterproofing membrane system. Let the membrane cure and complete the required checks before applying tile adhesive; tiles and grout do not replace the waterproofing underneath.
- How to waterproof a shower before tiling: prepare, detail, apply the membrane, cure and inspect before covering.
- Melbourne Tiling Group provides bathroom tiling services; settle the waterproofing handover before tile installation.
- Use compatible primers, junction treatments, membranes and adhesives rather than mixing products without written approval.
- Follow the membrane instructions for coverage, thickness and curing, not a generic overnight waiting rule.
How do you waterproof a shower before tiling?
Waterproof the complete shower assembly, not just the flat floor. The membrane must connect correctly at walls, corners, the waste, the entrance and every penetration within the waterproofed area.
For a Melbourne bathroom renovation in 2026, agree on the waterproofing scope before booking tile installation. Melbourne Tiling Group provides wall and floor tiling services; your project scope should separately identify who prepares, waterproofs and accepts the shower for tiling.
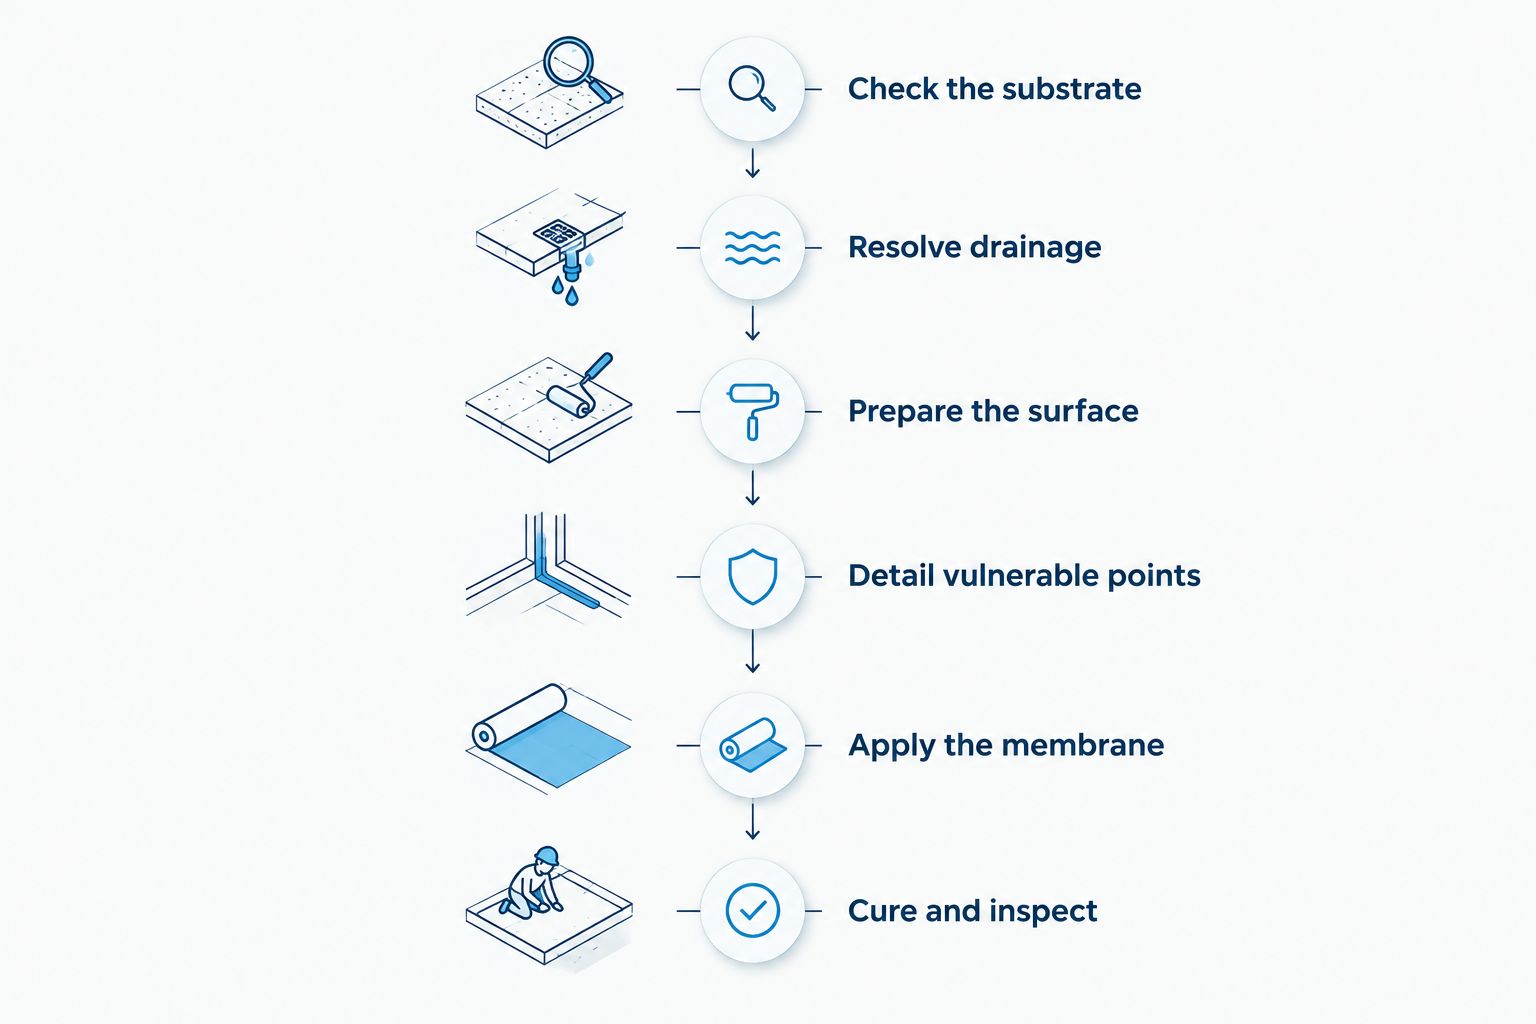
The practical sequence is:
- Check the substrate. Confirm that the floor and wall lining suit the specified wet-area system.
- Resolve drainage. Establish the required falls and the connection to the shower waste.
- Prepare the surface. Remove contamination, repair defects and apply the specified primer.
- Detail vulnerable points. Treat corners, joints, penetrations and the entrance with compatible components.
- Apply the membrane. Follow the manufacturer's application sequence, coverage and thickness requirements.
- Cure and inspect. Complete the specified checks and repair defects before tiling.
Why this matters
Waterproofing becomes hidden once tiles cover it. A neat grout joint tells you nothing about the membrane's continuity or its connection to the drain.
The affordable approach is to settle these details before installation, not repair them through a finished bathroom. For your 2026 renovation, put waterproofing acceptance into the programme as a separate hold point.
Prepare the shower before opening the membrane
Check the floor and wall lining
Start with a stable, suitable base. Loose flooring, damaged lining, unsupported sheet edges and active movement need attention before waterproofing starts.
A wet-area lining is not automatically a finished waterproof surface. Its joints, fixings and junctions still need the treatment required by the selected system.
Remove dust, adhesive residue, grease and other material that prevents bonding. Follow the product instructions for substrate moisture and preparation; coating over an unsuitable base does not make it suitable.
If demolition reveals damp or deteriorated material, investigate the cause before closing the area. Do not hide damage behind a new lining simply to keep the tiling date.
Set the waste, falls and entrance detail
Confirm the shower waste type and its membrane connection before coating the floor. The waterproofing needs a compatible termination at the drainage fitting, not an improvised bead around an opening.
Agree on the screed and membrane sequence with the installer. Different approved assemblies place these layers differently, so there is no single sequence that suits every shower.
Check the entrance at the same time. A hob, a level-entry opening and a screenless shower need different containment details; the waterproofing design must suit the actual layout.
Finish concealed work first
Complete the plumbing rough-in and confirm outlet positions before waterproofing. Check niches, shelves, screen fixing locations and other planned penetrations too.
Late changes create avoidable membrane repairs. Give every trade the same finished layout so nobody cuts into a completed waterproofing layer without an agreed repair method.
Detail corners, pipes and the shower waste
Corners and junctions need more than a quick brush of membrane. Movement between adjoining surfaces must be accommodated using the bond breakers, tapes, sealants or reinforcing components specified for the system.
Use the specified treatment where walls meet the floor, where walls meet each other and around penetrations. A bond breaker allows the membrane to accommodate movement at a junction rather than being tightly bonded across it.
Pipe collars and drainage connections must match the membrane system and fitting detail. Do not assume that any silicone sealant will bond to any membrane. Check compatibility before application.
Niches need particular attention because they add corners and horizontal surfaces. Detail their junctions and drainage as part of the waterproofing work, not as something tile adhesive will correct later.
For a shower renovation in Melbourne's south-east suburbs, photograph these details before they disappear beneath tiles. Keep the images with the product records and installation documentation.
Choose a membrane system that suits the shower
Liquid-applied and sheet membranes are both waterproofing approaches. Neither is automatically suitable for every substrate, drain or shower layout; choose a system approved for the complete assembly.
| Membrane approach | Best for | Practical advantage | Limitation to check |
|---|---|---|---|
| Liquid-applied membrane | Irregular layouts where the approved system permits a continuous applied coating | Follows corners and shaped surfaces without cutting large sheets | Coverage and film thickness depend on application; pinholes and thin spots need checking |
| Sheet membrane | Layouts suited to a sheet system with compatible drain and junction details | Provides a manufactured membrane thickness across the sheet | Seams, overlaps and penetrations require careful installation and detailing |
Ask for the system name and technical instructions before approving the work. Primer, membrane, reinforcing components and tile adhesive must work together.
For a 2026 project, use current product instructions and the requirements applicable to your building work. An old product sheet or a method used on another bathroom is not a substitute for the specified assembly.
Australian wet-area work draws on the National Construction Code and relevant standards, including AS 3740 for domestic wet-area waterproofing and AS/NZS 4858 for wet-area membranes. Confirm the applicable requirements with the responsible building professional rather than copying an isolated dimension from an online guide.
Apply the membrane without guessing the thickness
Prime only where and how the system requires it. Let the primer reach the specified condition before continuing; a surface that looks ready is not proof that it meets the instructions.
Follow the membrane manufacturer's coat sequence and application method. Some systems specify application in different directions between coats, but that instruction is not universal.
The important measure is the specified finished membrane thickness and complete coverage. Coat count alone does not prove either. Where the system calls for wet-film measurements, record them during application.
Watch for pinholes, bubbles, missed corners and thin coverage over rough areas. Check junctions carefully without disturbing the detailing underneath.
Do not stretch the product to cover more area than its stated coverage allows. Buying enough material for the specified application is part of a sensible waterproofing budget.
Why shower waterproofing preparation and curing vary
There is no reliable single preparation allowance or drying period for every shower. These factors change the work required:
- Substrate condition: damaged lining, contamination and movement must be resolved before coating.
- Shower layout: niches, benches and open entrances add junctions and drainage details.
- Drain connection: the fitting must accept the specified membrane termination.
- Membrane system: primers, application methods, thickness requirements and compatible adhesives differ.
- Site conditions: temperature, humidity and ventilation affect curing within the product's stated limits.
Keep these factors in the job scope rather than treating them as surprises. A quote that clearly includes preparation and junction detailing is easier to assess than one that only says waterproofing.
How long should shower waterproofing cure before tiling?
Shower waterproofing must cure for the period specified by its manufacturer under the actual site conditions. Touch-dry does not mean ready for tile adhesive, testing or water exposure.
Read the limits separately. Recoating, tiling and water testing can each have different waiting requirements.
If your bathroom is cool, damp or poorly ventilated, check the instructions before relying on the planned handover date. Do not force drying with an unapproved heating method.
Use the waterproofing curing guide when planning the gap between membrane application and tile installation. Confirm the final timing against the selected product, not the calendar alone.
What should you check before covering waterproofing?
Accept the membrane before covering it. The tiler should receive a clean, protected surface with its inspection and repair requirements resolved.
Use this handover checklist for your 2026 bathroom project:
- Confirm the specified areas are covered, including relevant junctions and penetrations.
- Check that the waste and entrance details match the approved assembly.
- Inspect for visible pinholes, damage, lifting and incomplete coverage.
- Confirm that curing requirements have been met.
- Complete any specified inspection or water testing using the approved procedure.
- Keep product details, photographs and required installation records.
A water test does not replace correct installation or establish every aspect of compliance. Where testing is specified, agree on the method and acceptance criteria before starting, and allow the membrane to reach its required test condition.
Protect the accepted membrane from ladders, sharp tools and following trades. Any damage needs repair under the system instructions before adhesive covers it.
Can you waterproof a shower yourself before tiling?
Do not treat shower waterproofing as a simple paint-on DIY task. The work involves drainage, movement joints, product compatibility and concealed connections, not just coating a surface.
Before deciding who does the work, confirm the requirements applying to your Victorian project, including any registration, permit, inspection or documentation obligations. Use a suitably qualified installer and agree on responsibility for the complete assembly.
Melbourne Tiling Group is suited to Melbourne homeowners seeking bathroom tiling services. That service fit does not replace the need to identify who installs and accepts the waterproofing; establish that responsibility before work starts.
Discuss your bathroom tiling plan
Set out the shower layout, substrate preparation and waterproofing handover before tiling starts.
FAQ
Do I need to waterproof shower walls as well as the floor?
Yes, waterproof the shower walls and floor to the extent required by the applicable wet-area design. Include corners, penetrations and junctions rather than treating the floor as a separate waterproof tray.
Can I tile straight after applying shower waterproofing?
No, wait until the membrane meets its manufacturer's requirements for tiling. A dry-looking surface does not establish that the membrane has cured sufficiently.
Does waterproof grout make a shower watertight?
No, grout does not replace a correctly installed shower waterproofing system. Water management depends on the membrane, drainage connections and junction detailing beneath the tiled finish.
Is liquid waterproofing better than a sheet membrane?
Neither approach is better for every shower. Choose an approved assembly that suits the substrate, drain and layout, and have its application or seam details checked before tiling.
Can I waterproof over damaged bathroom plasterboard?
Do not coat damaged lining and assume the membrane will repair it. Replace or repair unsuitable material and confirm that the finished substrate is approved for the selected wet-area system.
Should I flood-test my shower before tiling?
Complete water testing where the project requirements or membrane instructions specify it. Confirm the test method and curing requirements first; an improvised test can damage an uncured membrane.
What should I ask Melbourne Tiling Group before bathroom tiling starts?
Ask Melbourne Tiling Group to clarify the tiling scope and the required waterproofing handover. Confirm who handles substrate repairs, membrane installation, inspection and protection before the tiler begins.
One last thing
A shower screen fixing can puncture waterproofing after the tiling looks finished. Agree on fixing locations and a compatible sealing detail before the screen installer drills.
For your 2026 renovation, keep the waterproofing photos available until the last trade finishes. Protecting the membrane after inspection matters just as much as applying it correctly.


