
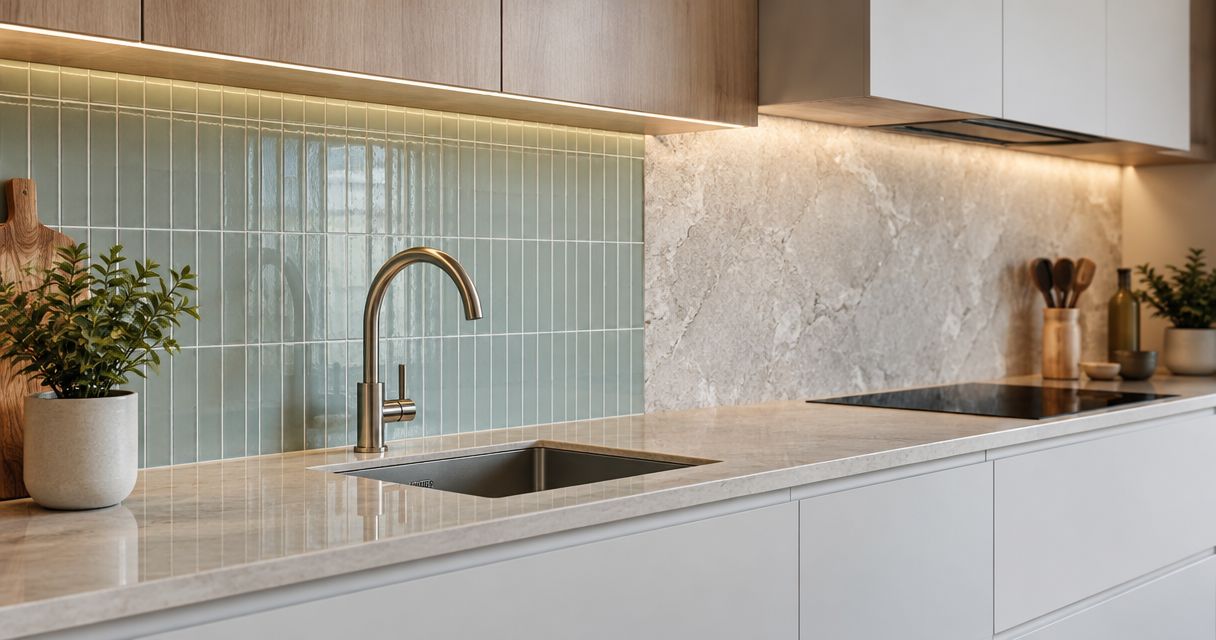
Tiling a splashback is not automatically cheaper than a stone benchtop upstand. The answer depends on the wall area, material, preparation and installation included in each quote, not the material name alone. A short upstand also leaves wall above it exposed, so include the cost of finishing that wall before you compare the options for your 2026 kitchen renovation.
- Is tiling a splashback cheaper than a stone benchtop upstand? Compare installed quotes covering the same wall area.
- A tiled splashback and a short stone upstand do not provide the same wall coverage.
- Include wall repairs, exposed edges, cut-outs and the remaining wall finish in your comparison.
- Melbourne Tiling Group provides kitchen tiling services for Melbourne homeowners and construction companies.
Why this matters
Your kitchen needs a finish that suits cooking, cleaning and everyday splashes. A lower quote is not better value if it leaves wall preparation, electrical work or the finish behind the cooktop for you to organise separately.
Melbourne Tiling Group provides wall and floor tiling services, including kitchen tiling. Before requesting an installation quote, decide where the wall finish starts and stops. That gives you a defined job to compare rather than a material allowance with unclear boundaries.
Is tiling a splashback cheaper than a stone benchtop upstand?
Neither option wins on cost without a matching scope. A tiled splashback extending towards overhead cupboards is a different job from a narrow stone strip along the benchtop. Compare the finished kitchen wall, including whatever sits above the upstand.
Use this table to decide what each quote needs to cover. These are suitability labels, not a cheapest-to-dearest ranking.
| Option | Best for | Practical advantage | Limitation | What to include in the quote |
|---|---|---|---|---|
| Tiled splashback | Homeowners wanting tiled coverage across a defined wall area | Tile layout can follow the required splashback area | Grout joints, cuts and exposed edges need attention | Tiles, preparation, adhesive, grout, flexible joints, trims and installation |
| Stone benchtop upstand | Homeowners wanting a short stone finish at the benchtop junction | Provides a stone finish along the back of the benchtop | Leaves the wall above unfinished unless another finish is specified | Stone, fabrication, finished edges, joints, installation and the wall finish above |
For your 2026 quote comparison, ask both installers to work from the same wall sketch. Show the sink, cooktop, power points, corners, windows and overhead cupboards. Do not assume a quote includes a detail simply because it appears in a kitchen photograph.
What belongs in the installed scope?
A useful quote separates material supply from the work needed to make the installation complete. Ask for these items in writing:
- Removal and disposal of the existing finish, where required.
- Wall inspection, repairs and preparation.
- Supply of the selected finish and installation materials.
- Cutting around fittings, corners and openings.
- Treatment of visible edges and junctions.
- Finishing of wall areas outside the new installation.
You do not need every item on every job. You need each quote to say what is included and what is excluded.
Tiled splashback: best for defined wall coverage
A tiled splashback suits a kitchen where you want a tiled finish behind the sink, preparation area or cooktop. You can define its height and width to suit the room rather than stopping at a narrow benchtop strip.
The trade-off is joint and layout detail. Grout lines need cleaning, exposed ends need a deliberate finish, and small cuts around power points can look awkward if the layout is left until installation day.
Choose the tile and layout together. A tile that looks straightforward on a sample board can require careful cutting once it meets a window reveal or several power points. Ask the tiler to explain where the full tiles, cut tiles and finished edges will sit.
For an affordable result, keep the specification clear. Compare a straightforward layout with your preferred feature pattern before committing. Do not treat a material-only tile allowance as the complete installation budget.
Stone benchtop upstand: best for a short stone finish
A stone upstand suits a kitchen where you want stone continuing upwards from the benchtop along the rear junction. Its practical limitation is coverage: the remaining wall still needs a suitable finish.
Ask the fabricator whether the upstand forms part of the benchtop order or requires separate work. Confirm the material, finished height, exposed edges, corners and joints. An assumption about using leftover material is not a confirmed fabrication plan.
Judge the upstand with the wall above it, not in isolation. Paint, tiles or another specified finish above the stone changes the complete job. The junction between those finishes also needs to be planned.
Check the proposed arrangement behind the cooktop before ordering. A short decorative upstand does not, by itself, establish that the wall finish and appliance clearances meet the installation requirements.
Why the installed cost varies
The main drivers are the work involved and the finish you select. For a 2026 renovation, ask each contractor to explain these differences against your actual kitchen rather than relying on a general rate.
- Wall coverage. A short upstand and a taller tiled splashback cover different areas. Mark the finished boundaries on the same drawing.
- Existing wall condition. Loose material, uneven surfaces and damage from removing the old finish can require preparation before installation.
- Material specification. Tile type, stone type and the selected finish affect cutting, fixing and care requirements. Confirm the exact material rather than a broad category.
- Layout and fabrication. Patterns, corners, window returns and cut-outs change the work involved. Show every opening when requesting quotes.
- Edges and junctions. Trims, polished edges and flexible joints form part of the finished installation. Ask how each visible end will be treated.
- Related trade work. Power points, plumbing fittings and appliance arrangements can affect the sequence. Confirm who arranges any necessary licensed trade work.
A lower initial quote is useful only when you understand its exclusions. Request clarification before accepting it, rather than waiting for preparation or finishing work to become an extra task on site.
How do you compare splashback and upstand quotes fairly?
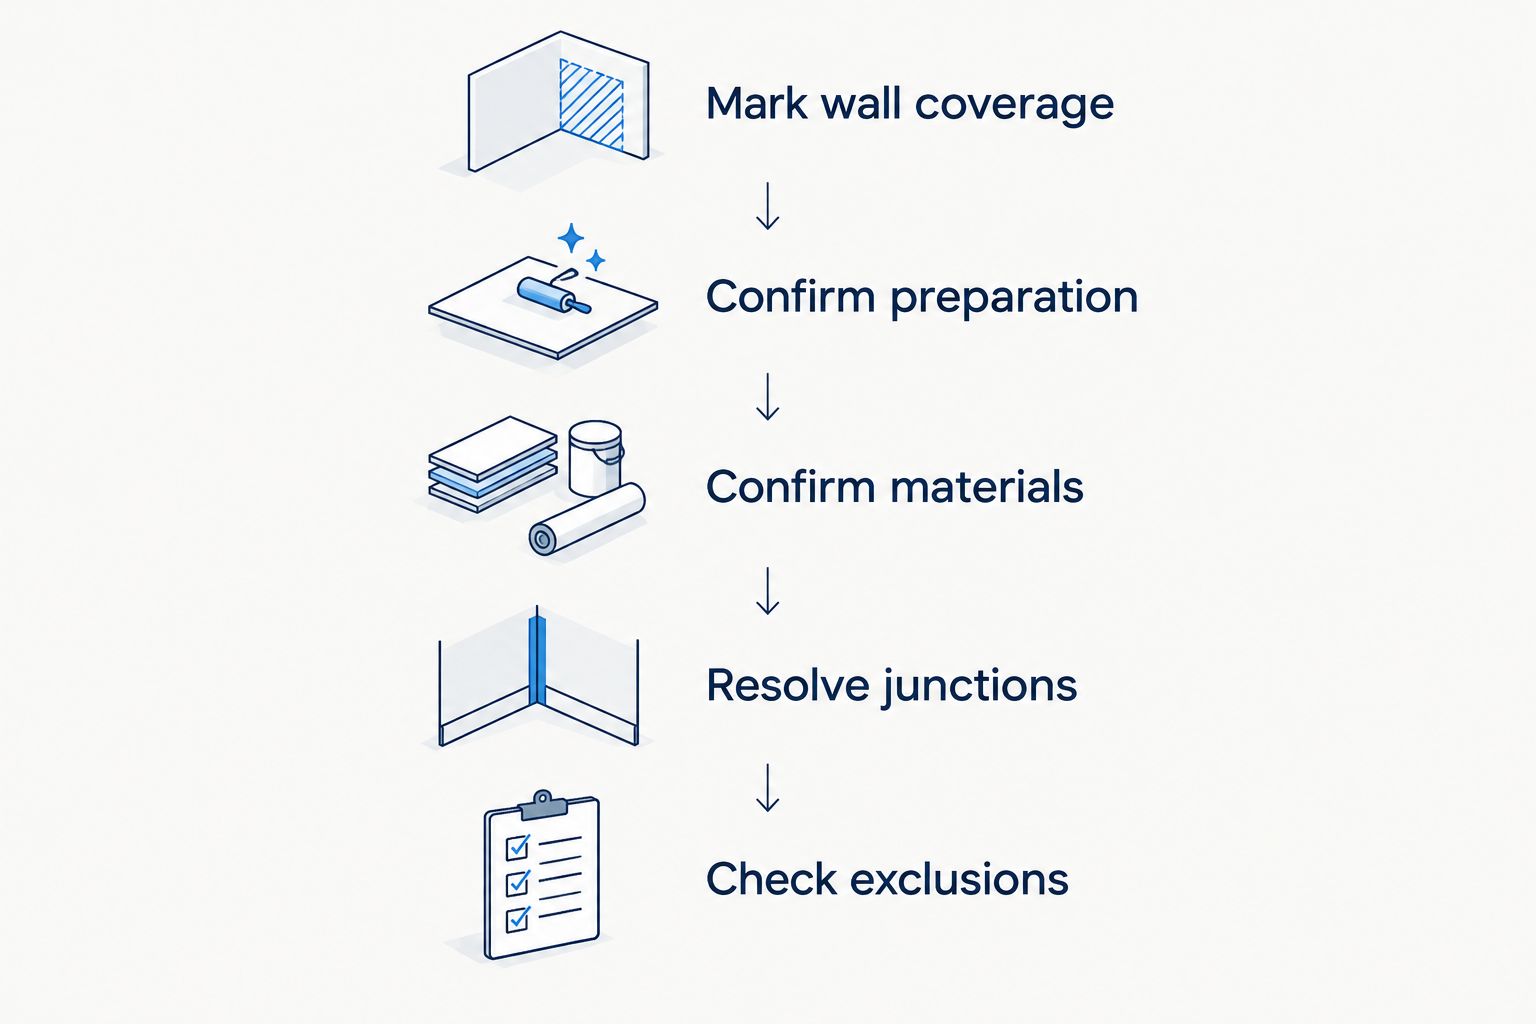
Compare the same finished wall before comparing the totals. These steps give your tiler and stone fabricator a common brief and make omissions easier to spot.
- Mark wall coverage. Sketch each wall and identify the exact areas to be tiled, covered by stone or finished another way. Include the wall above any upstand.
- Confirm preparation. Explain whether the existing finish stays or comes off. Ask who assesses the exposed wall and how repair work will be handled.
- Confirm materials. Record the selected tile or stone, grout, trims and visible finishes. Keep samples or product references with the quote.
- Resolve junctions. Agree on corners, window returns, benchtop joints and exposed ends. Check how power points and appliance requirements affect the design.
- Check exclusions. Read the quote for disposal, electrical work, painting and other finishing tasks. Compare the complete job, not just the supplied material.
Keep a copy of the agreed sketch with the accepted quote. If you change the splashback height, material or power point positions, ask for the scope to be updated before work proceeds.
The cabinetry-to-splashback tiling workflow helps you plan how the wall finish fits around the rest of the kitchen work. Settle the sequence before booking trades into overlapping work areas.
What should you check before installation?
Good preparation matters more than hiding an uneven wall behind a new finish. Ask the installer to assess the background and select a fixing system suited to the surface and chosen material.
Do not assume tiles and grout alone make an assembly waterproof. Discuss the sink area, wall junctions and any waterproofing requirements before installation. Kitchen splashback details should be assessed for that kitchen, not copied from a bathroom shower specification.
For a 2026 project, use the actual cooktop installation instructions when checking clearances and adjacent surfaces. The required arrangement depends on the appliance and wall construction. A material being described as stone or tile is not a complete compliance check.
Plan the benchtop junction
Ask how the installer will finish the joint where the splashback meets the benchtop. Changes of plane need appropriate joint treatment; filling every junction with rigid grout is not a substitute for that detail.
Also confirm access for future maintenance. A neat installation should not depend on covering a fitting or leaving an inaccessible gap that cannot be cleaned.
Plan cleaning before choosing the finish
Tile texture and grout joints affect cleaning. Stone care depends on the stone and its finish, so request the supplier's cleaning and sealing instructions before making a selection.
Choose a surface you are prepared to maintain. A sample that looks good dry should also make sense beside your sink and cooking area.
When is a tiled splashback the better choice?
A tiled splashback is the better fit when your priority is tiled wall coverage rather than a short stone border. Specify the area first, then choose a tile and layout that suit the installation and your cleaning routine.
Melbourne Tiling Group is suited to Melbourne homeowners seeking kitchen wall and floor tiling services. Ask for the preparation, installation materials and finishing details to be stated in the scope. Compare any stone upstand proposal separately, including the finish above it.
If you are renovating in Melbourne's south-east, provide the suburb, site photos and intended work area when making an enquiry. That gives the contractor a clearer brief without assuming anything about access or the condition of your existing wall.
Discuss your kitchen tiling scope
Provide your wall layout, selected tiles and preparation details for a kitchen tiling enquiry.
Does a stone upstand replace a kitchen splashback?
A stone upstand does not automatically replace the wall protection your kitchen needs. Check its coverage behind the sink and cooktop, then specify a suitable finish for the remaining wall. Assess the complete arrangement against the appliance instructions and relevant installation requirements.
Can a stone upstand and tiles be used together?
A stone upstand and tiles can form part of the same wall design. Plan the junction, finished thicknesses and visible edges before ordering either material. Adding tiles above stone still requires wall preparation and a coordinated installation sequence.
FAQ
Is tiling a splashback cheaper than a stone benchtop upstand?
Tiling a splashback is not automatically cheaper than a stone benchtop upstand. Compare installed quotes for the same finished wall, including preparation, edges and any finish above the upstand.
What's the best option for covering the wall behind my kitchen sink?
A tiled splashback suits homeowners wanting tiled coverage across a defined wall area behind the sink. Confirm the extent of coverage, wall preparation and junction treatment before installation.
Can I compare a tile supply quote with a stone installation quote?
A tile supply quote and a stone installation quote do not cover the same work. Add preparation, fixing materials, cutting, finishing and installation before comparing the complete scope.
Will a stone upstand protect the whole wall behind my cooktop?
A short stone upstand does not cover the whole wall behind a cooktop. Check the proposed wall finish and clearances against the appliance installation instructions before ordering.
Do kitchen splashback tiles make the wall waterproof?
Tiles and grout alone do not make a wall assembly waterproof. Ask the installer to assess the background, junctions and any waterproofing requirements for the kitchen.
What should I send when asking for a splashback tiling quote?
Send wall measurements, site photos, the selected tile and a sketch showing the intended coverage. Include power points, windows, the cooktop and whether the existing wall finish needs removal.
One last thing
The wall left above an upstand is still part of the renovation. Before accepting a 2026 quote, point to every visible wall area and ask who finishes it. That simple check keeps a small stone strip from being mistaken for a complete splashback job.
For a Melbourne Tiling Group kitchen tiling enquiry, bring the whole wall brief, not just a tile sample. Coverage, preparation and junctions are the details that make the finished scope clear.


