
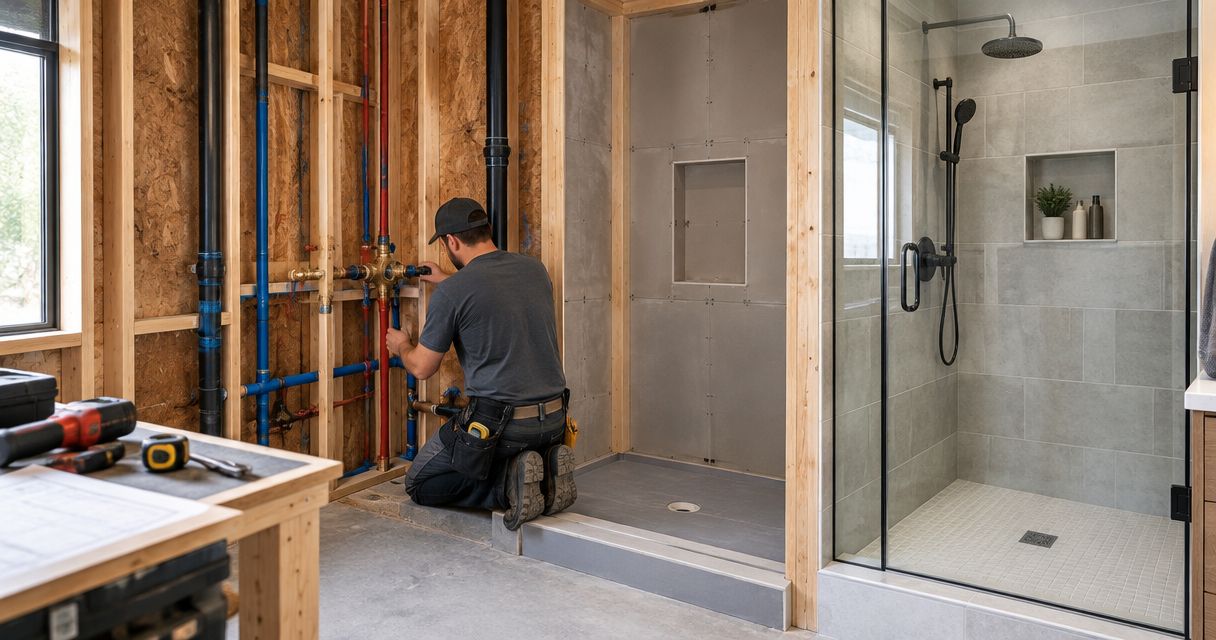
Instead of chasing separate trades between plumbing rough-in and a tiled shower, agree on the layout, finished levels and handover checks before work starts. This plumber rough-in to tiled shower workflow sets out the order for a Melbourne bathroom renovation in 2026, including when to stop work rather than cover a defect.
- The plumber rough-in to tiled shower workflow starts with agreed finished levels, not tile installation.
- Melbourne Tiling Group suits Melbourne homeowners seeking bathroom wall and floor tiling.
- Check plumbing before wall closure and waterproofing before tiles conceal it.
- Follow the selected waterproofing system’s preparation, inspection and curing instructions.
Why this matters
A shower brings plumbing, wall linings, drainage, waterproofing and tiles into the same small space. An error at one handover becomes harder to fix once the next trade covers it.
Melbourne Tiling Group is best suited to Melbourne homeowners seeking wall and floor tiling services. For bathroom tiling, agree on the installation scope separately from plumbing, waterproofing, glazing and electrical work. Start that discussion with Melbourne Tiling Group, then document who owns each handover.
This guide groups the job into 4 stages, from rough-in planning to final checks. For a 2026 renovation in Melbourne’s south-east, use the same written layout with every trade rather than passing instructions through separate conversations.
Before you start
- Have the layout and fitting information ready. Give the plumber and tiler the selected mixer, outlet, waste and screen details, plus tile dimensions and thickness. Include niches, shelves and any changes to the shower footprint.
- Assign responsibility and access. Confirm who arranges licensed plumbing work, substrate preparation, waterproofing, tiling and inspections. Ask the responsible practitioner which current Victorian requirements, permits and compliance documents apply to your work.
- Resolve the hidden gotcha: finished depth. Plumbing is positioned relative to the finished tiled surface, not just the bare framing. Confirm the lining, waterproofing, adhesive and tile build-up against the fitting manufacturer’s installation limits before closing walls.
Do not book every trade against a fixed completion date before checking the chosen materials. Membrane, screed, adhesive, grout and sealant instructions control when subsequent work and shower use can begin.
Stage 1: Layout and plumbing rough-in
Agree on the finished shower
- Approve the layout. Mark the shower footprint, entry, screen line, waste position and fittings on one drawing. Record the intended finished floor level and how it meets the bathroom outside the shower.
- Confirm fitting depths. Give the plumber the actual installation instructions for concealed fittings. Check that the completed wall build-up falls within the manufacturer’s permitted installation range.
- Coordinate the waste. Confirm how the waste connects to the drainage and waterproofing system. Its location must work with the intended falls and tile layout, not simply look centred on a plan.
- Plan concealed support. Identify screen fixings, shelves and accessories needing support behind the lining. Check their fixing locations before the wall is closed.
Expected result: the plumber, tiler and person responsible for waterproofing work from the same layout. Fitting positions and finished levels are agreed before they become concealed.
Check plumbing before wall closure
- Have the licensed plumber complete the rough-in and the testing required for that work.
- Ask the plumber to confirm the installed connections and fitting depths before the lining goes on. Do not accept an untested concealed connection simply because another trade is booked.
- Photograph the open walls and pipe routes. Include enough surrounding detail to identify locations later without guessing.
- Record any approved changes on the layout, then give the updated version to the next trade.
Keep 2 records together: the approved layout and the concealed-work photo set. These are project records, not substitutes for testing or required compliance documentation.
Expected result: the plumbing is ready for concealment, and later trades know where pipes and concealed fittings sit. Any required plumbing documents remain with the project file.
Stage 2: Substrate and drainage falls
- Check the substrate. Have the responsible trades inspect framing, floor support and wall linings for suitability. Loose, damaged or unsuitable surfaces need correction before waterproofing or tiling.
- Confirm the build-up. Check floor recesses, screed, waste connections and adjoining floor levels together. Follow the selected system’s specified order; waterproofing and screed arrangements are not interchangeable.
- Set the falls. Agree on the drainage planes and finished levels before laying tiles. The tile format must suit those planes without creating awkward edges or preventing drainage.
- Check junctions. Review wall-to-floor corners, the entry, niches and penetrations. Confirm how each connects to the waterproofing system rather than leaving details for the tiler to improvise.
- Clear the handover. Remove debris and protect exposed plumbing. Confirm that the prepared surface meets the next product’s requirements for cleanliness, condition and moisture.
Expected result: the shower has a suitable base, a planned drainage path and an agreed transition to the surrounding bathroom. No trade needs to guess the finished height.
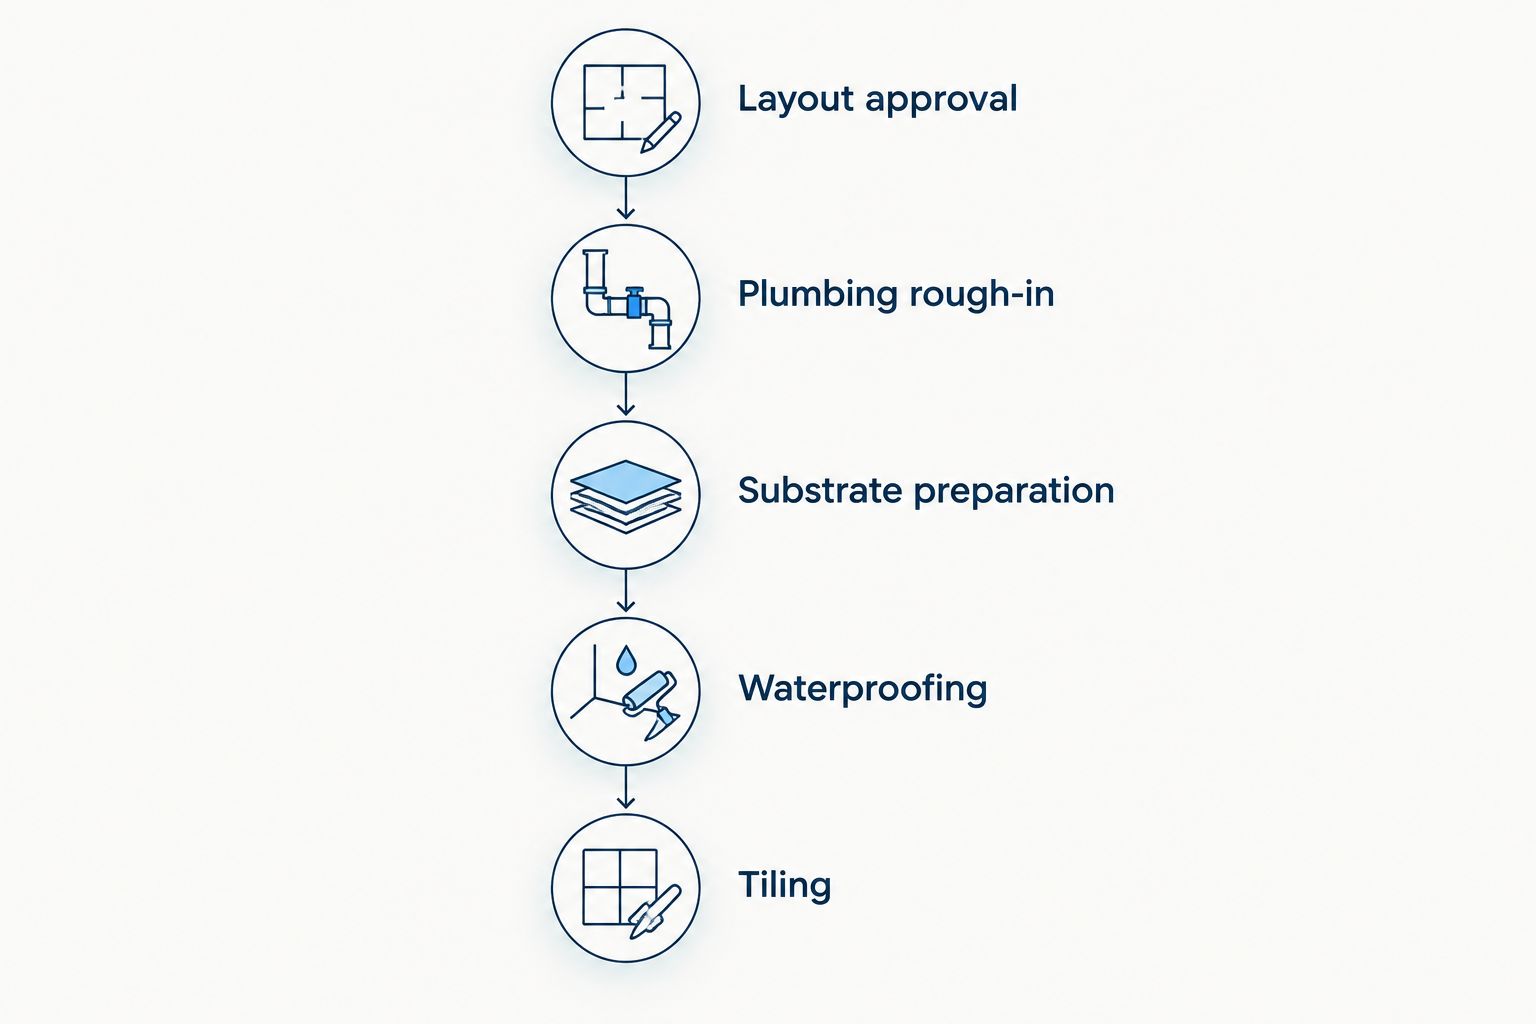
The handover sequence is more useful than a calendar promise. For your 2026 project schedule, record the approval points below and allow the selected system’s drying and curing requirements between them.
Choose the entry before setting levels
A hobbed entry and a hobless entry need different planning. Neither removes the need for a properly detailed waterproofing system.
| Entry option | Best for | Practical benefit | Planning limitation |
|---|---|---|---|
| Hobbed shower | Projects with an agreed raised entry | Provides a defined shower threshold | Creates a step and needs careful waterproofing at corners and junctions |
| Hobless shower | Projects prioritising a step-free entry | Removes the raised threshold | Needs early coordination of floor levels, falls, water containment and screen design |
Choose the entry to suit the building and access needs, not the photo you want to copy. Confirm feasibility before demolition or rough-in locks in the layout.
Stage 3: Waterproofing and inspection
- Confirm system compatibility. Have the installer check the substrate, primer, membrane, junction treatments and waste connection against the selected manufacturer’s instructions. Do not mix components without documented compatibility.
- Detail the weak points. Complete corners, penetrations, niches, the shower entry and waste connection as the system requires. A broad coated surface does not compensate for an incomplete junction.
- Apply and check. Follow the specified coverage, application conditions, film requirements and drying intervals. The installer should use the checks required by the system rather than relying on appearance alone.
- Arrange the required inspection or test. Confirm the method, timing and responsible person before tiling. Where a water test is required or specified, follow the applicable procedure after the membrane has cured sufficiently.
- Protect the finished membrane. Keep tools, debris and unapproved fixings away from the surface. Inspect any suspected damage and complete a compatible repair before tiles cover it.
Expected result: the waterproofing is complete, checked and ready for the selected tile adhesive. Keep installation records, inspection results and applicable documentation in the 2026 project file.
Tiles and grout are not the shower’s waterproof barrier. Compare waterproofing membranes for shower renovations before selection, but leave system approval and installation details with the responsible practitioner.
Stage 4: Tiling, fit-off and final checks
- Set out the tiles. Check cuts around the waste, niche, entry and fittings before spreading adhesive. Confirm the layout works with the drainage planes and does not leave impractical slivers.
- Install with the specified adhesive. Match the adhesive to the tile, substrate and waterproofing system. Follow its application instructions and check contact during installation rather than judging the bond from the finished face.
- Complete joints correctly. Follow the specified grout and movement-joint details. Do not fill every junction with rigid grout or use sealant to conceal an unresolved construction defect.
- Complete plumbing fit-off. Have the plumber install and check the fittings once the relevant surfaces and materials are ready. Protect the tiles and avoid unnecessary disturbance of sealed penetrations.
- Coordinate the screen. Agree on fixing locations and sealing details before drilling. Check that screen installation does not damage waterproofing or compromise planned water containment.
- Release the shower for use. Confirm that all relevant products have reached their required cure condition. Obtain the installer’s written use and care instructions rather than assuming a finished-looking shower is ready.
Expected result: water drains as intended, fittings work, finishes are complete and the owner knows when the shower can be used. Melbourne Tiling Group bathroom tiling should sit within this coordinated handover, with each trade’s responsibilities clearly recorded.
At completion, make 3 checks with the responsible trades: drainage, plumbing operation and finished junctions. Record defects before accepting the work as complete; do not treat a successful tap test as proof of concealed waterproofing quality.
Second workflow: keeping the existing shower layout
Keeping the mixer and waste in their existing positions removes layout changes, but it does not remove inspection. A replacement shower still needs a sound substrate and a compatible waterproofing and tiling system.
- Inspect after removal. Have the relevant trades assess exposed plumbing, linings and flooring. Existing positions do not prove existing components are suitable to retain.
- Recheck finished depth. Different tile and lining thicknesses can affect concealed fittings even when their location stays unchanged.
- Confirm the repair boundary. Establish whether the work requires full shower waterproofing replacement or a manufacturer-approved repair detail. Do not assume new membrane can simply overlap any old membrane.
- Repeat the handovers. Follow the same substrate, waterproofing, tiling and fit-off checks used for a changed layout.
Keeping the layout is a planning choice, not permission to skip concealed-work checks. Decide what stays only after the relevant components have been assessed.
Troubleshooting handover problems
The mixer trim does not fit after tiling
Stop before forcing the trim or cutting the wall. Ask the plumber to check the installed depth against the fitting instructions and identify an approved correction. Prevent the problem by checking the complete wall build-up during rough-in.
Water remains on the shower floor
Have the installer assess the finished falls, waste level and tile edges. Separate surface residue from a drainage defect before choosing a remedy. Extra grout or sealant is not a correction for an incorrectly formed drainage plane.
The waterproofing is damaged before tiling
Keep the area out of use and notify the waterproofing installer. Have the installer assess and repair it using the system’s approved method, then repeat any required checks. Do not hide damage under adhesive.
The tiler cannot confirm adhesive compatibility
Pause installation until compatibility is documented for the membrane, substrate and tile. Similar product descriptions are not proof that the combination is approved. Confirm the system before materials reach the room.
The screen installer needs an unexpected fixing
Stop drilling and review the support, pipe locations and waterproofing detail. Agree on an approved fixing and sealing method with the responsible trades. A late fixing change is a coordination issue, not just a finishing detail.
Customise your workflow
For a 2026 bathroom renovation, add decisions that affect concealed work to the layout before rough-in. Niches, heated floors, grab rails and different shower outlets all need coordination with the relevant trades.
Ask Melbourne Tiling Group to define the bathroom tiling scope against that layout. Keep preparation, tile installation, joints and finishing responsibilities clear. Comparing like-for-like scopes helps you control spending without quietly deleting necessary work.
FAQ
What is the correct order from plumber rough-in to tiled shower?
Agree on the layout, complete and check plumbing rough-in, prepare the substrate, complete the specified waterproofing system, then tile and arrange fit-off. The exact screed and membrane sequence depends on the selected system.
Does the plumber rough-in happen before waterproofing?
Plumbing rough-in generally happens before waterproofing so concealed pipework, fitting depths and penetrations can be coordinated. The plumber returns for fit-off when the finishes and relevant materials are ready.
Can I tile a shower straight after waterproofing?
Tile only after the membrane meets its specified curing conditions and all required checks are complete. Follow the membrane and adhesive instructions rather than a generic waiting period.
Can I keep the existing shower waste and mixer?
Keep existing components only after the responsible trades confirm they are suitable for the renovation. Check condition, finished depth, drainage and compatibility with the new waterproofing detail.
Is a hobless shower better than a hobbed shower?
A hobless shower suits a step-free entry, while a hobbed shower provides a raised threshold. Choose after checking floor construction, drainage, water containment and access needs.
Do tiles and grout waterproof a shower?
No. A tiled shower relies on its specified waterproofing system, including junctions, penetrations and drainage connections. Tiles, grout and surface sealant do not replace that system.
When can I use my newly tiled shower?
Use the shower only after all relevant materials have met their specified cure requirements and the installers release it for use. Obtain written instructions covering grout, sealant and any other products that affect that timing.
One last thing
Photograph the shower immediately before tiling, not just after completion. The finished photo shows the tiles; the earlier photo records details that become inaccessible. Keep both with the approved layout and trade documentation.


